
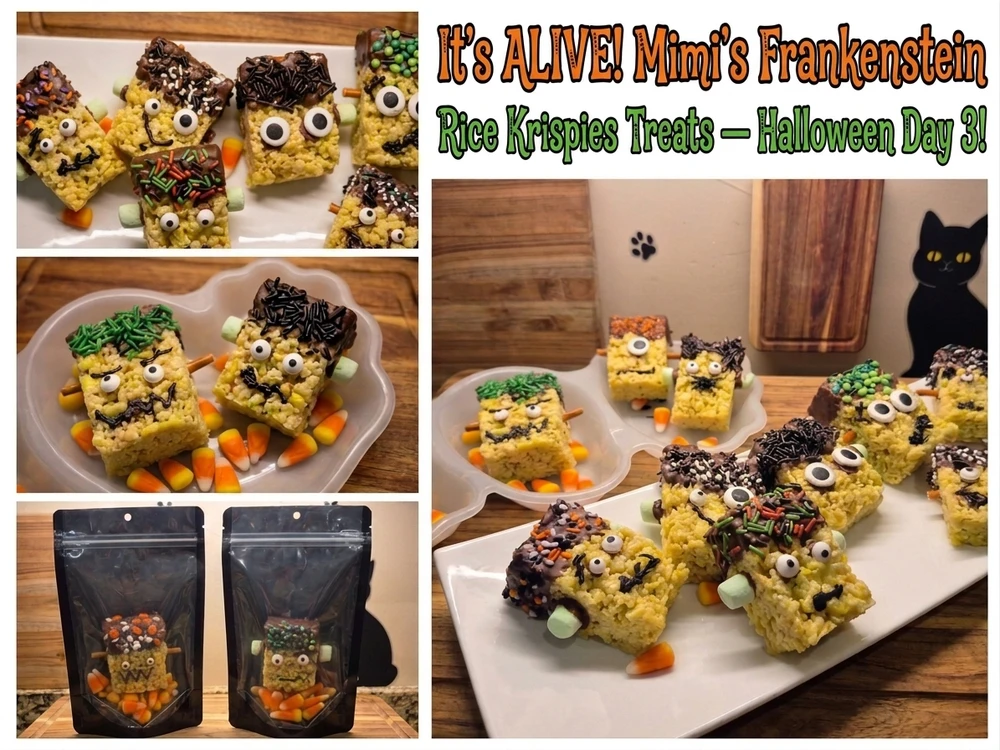
It's ALIVE! Mimi's Frankenstein Rice Krispies Treats — Halloween Day 3!
Posted by Mimi on Oct 22nd 2026
⚡ It's ALIVE! Mimi's Frankenstein Rice Krispies Treats — Halloween Day 3!
Green monsters, chocolate hair, pretzel bolts, and a whole lot of marshmallow mischief!
By Mimi | PackFreshUSA
IT'S ALIVE! IT'S ALIVE! ⚡
Oh, my little ghosts and goblins, have I got a MONSTER of a treat for you today!
Welcome back to Day 3 of Mimi's Halloween Treat Adventures!
We've already had a frightfully delicious time in Mimi's kitchen.
On Day 1, we created our Monster Mash Rice Krispies Treats with Reese's Pieces, Halloween sprinkles, and candy eyeballs.
Then, on Day 2, we got a little carried away with our Triple-Layer Candy Corn Rice Krispies Treats. Three colorful layers, real candy corn melted into the marshmallows, and extra candy corn on top!
But today?
Oh, we're going GREEN!
And I'm not talking about vegetables!
We're bringing a certain famous Halloween monster to life, one marshmallow at a time.
Meet Mimi's Frankenstein Rice Krispies Treats!
Bright green marshmallow treats, dark chocolate hair, silly candy eyeballs, pretzel bolts, and little stitched smiles made with black writing icing.
And trust me, these little monsters have PERSONALITY!
Some look happy, some look surprised, and a few look like they just woke up from a hundred-year nap.
Which, quite frankly, is how Mimi feels some mornings before her first cup of coffee!
A Little Monster Magic in Mimi's Kitchen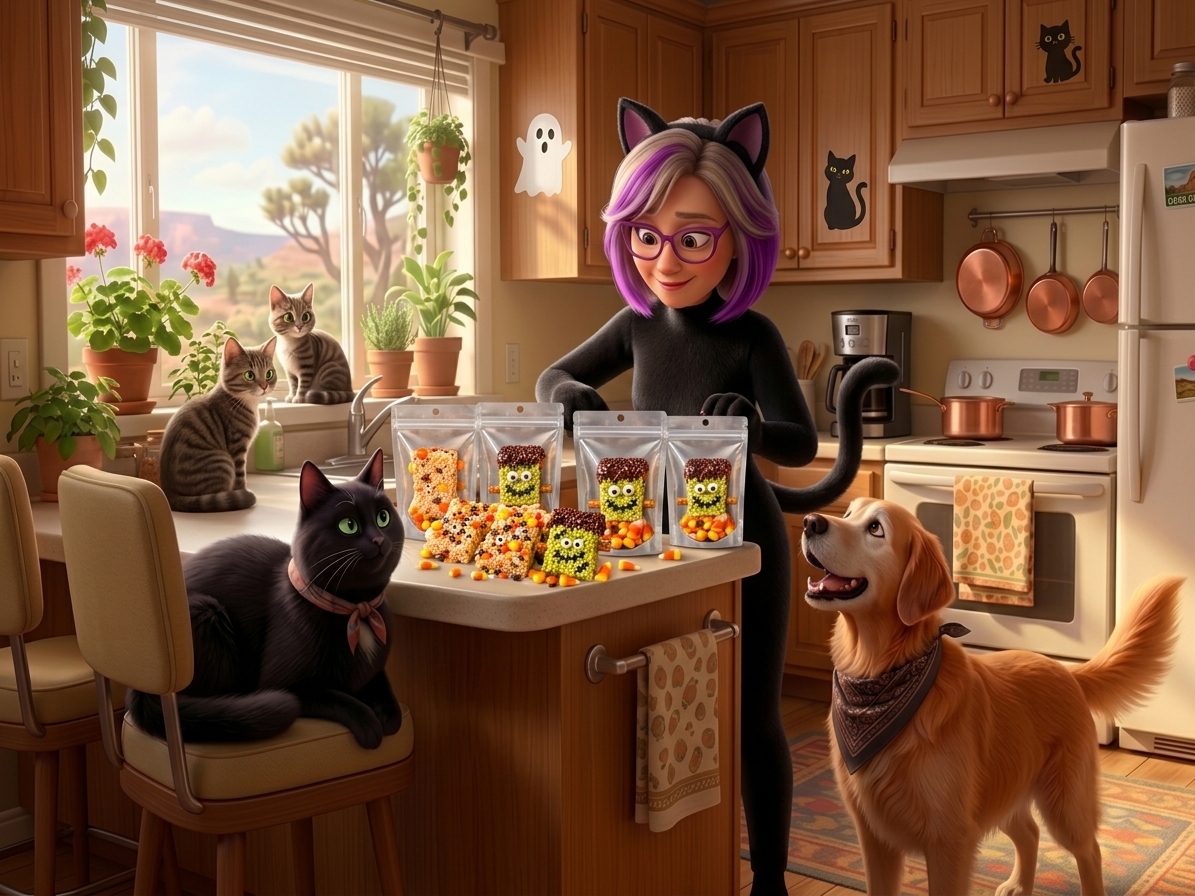
One of my favorite things about Halloween is taking ordinary recipes and turning them into something completely unexpected.
And Rice Krispies treats are perfect for that!
They're easy to make, fun to decorate, and just sticky enough to hold all kinds of silly Halloween decorations.
For our Frankenstein creations, we're starting with a classic marshmallow Rice Krispies recipe.
But instead of leaving them their traditional color, we're adding green food coloring to create that perfect monster-green complexion.
Then we're giving each little monster a chocolate hairstyle, candy eyes, and pretzel bolts.
Because what's Frankenstein's monster without his famous bolts?
And the best part?
No two monsters have to look alike!
That's what makes them so much fun.
Mimi's Frankenstein Rice Krispies Treats Recipe
Prep Time: Approximately 20 minutes
Decorating Time: 20–30 minutes
Setting Time: Approximately 30–60 minutes, plus time for decorations to set
Yield: Approximately 12–16 monsters, depending on how large you cut them
Ingredients
For the Green Rice Krispies Treats:
-
6 cups Rice Krispies cereal
-
1 package (10 oz.) miniature marshmallows
-
3 tablespoons butter
-
Green food coloring, preferably gel
-
Optional: ½ teaspoon vanilla extract
For Decorating Your Little Monsters:
-
Approximately 1 cup dark chocolate melting wafers or dark chocolate
-
Brown or black chocolate sprinkles (jimmies)
-
Candy eyeballs
-
Small pretzel sticks
-
Black writing icing
-
Optional: Additional melted chocolate for attaching decorations
You'll Also Need:
-
A 9 × 13-inch baking pan
-
Parchment paper
-
Large saucepan
-
Spatula or wooden spoon
-
A sharp knife
-
Your saved butter wrapper!
-
PackFreshUSA Black-and-Clear Stand-Up Pouches
Step 1: Create Your Monster-Green Marshmallow Mixture
In a large saucepan over low heat, melt your butter.
Add the miniature marshmallows and stir gently until completely melted and smooth.
Now comes the fun part!
Add a few drops of green food coloring and stir until you have that perfect Frankenstein green.
You can make your monsters bright lime green or a deeper spooky green.
I like a nice bright green because it really stands out against the dark chocolate hair.
If you're using vanilla extract, stir it in now.
Remove the saucepan from the heat and gently fold in your Rice Krispies cereal.
Stir until all the cereal is coated in that beautiful green marshmallow mixture.
And just like that, our monster-making adventure has begun!
Step 2: Mimi's Secret Weapon — The Butter Wrapper!
Now, before you toss that butter wrapper into the trash...
STOP!
Here's one of my favorite little kitchen tricks!
Save your butter wrapper!
After adding the butter to your marshmallow mixture, set the wrapper aside.
Line your baking pan with parchment paper or lightly grease it.
Transfer your green Rice Krispies mixture into the pan.
Now take that saved butter wrapper and use the buttery side to gently press and smooth the mixture into place.
The leftover butter helps prevent the sticky marshmallow mixture from clinging to your hands.
It also makes spreading the mixture into the corners so much easier!
And remember...
Don't press too hard!
We want soft, chewy monsters, not little green bricks!
Less mess, less waste, and a whole lot of Mimi magic!
Step 3: Shape Your Little Frankenstein Monsters
Allow your Rice Krispies mixture to cool and set until it's firm enough to cut.
Lift it out of the pan using the parchment paper.
Now, instead of cutting traditional squares, we're cutting our treats into rectangles.
Why rectangles?
Because they make the perfect little Frankenstein heads!
Try to keep them fairly even so they'll be easy to decorate.
But don't worry if some are a little crooked.
We're making monsters, not entering a beauty contest!
In fact, I think the slightly imperfect ones are sometimes the cutest.
Step 4: Give Frankenstein Some Chocolate Hair!
Now we're getting to one of my favorite parts!
Melt your dark chocolate according to the package directions.
Take each green Rice Krispies rectangle and dip the top portion into the melted chocolate.
This creates Frankenstein's famous dark hair.
And while that chocolate is still wet...
SPRINKLE AWAY!
Add brown or black chocolate sprinkles over the melted chocolate.
The sprinkles give your little monsters that wonderfully messy, textured hairstyle.
And let's face it...
Frankenstein's monster has never been known for having a perfectly styled haircut!
Place your decorated treats on parchment paper and allow the chocolate to begin setting.
Step 5: Give Those Monsters Some Eyes!
Now it's time to bring our little creations to life!
Using a tiny dab of melted chocolate or decorating icing, attach two candy eyeballs to the front of each green Rice Krispies rectangle.
Place them just below the chocolate hairline.
Here's where you can really have some fun!
Want a surprised monster?
Put the eyes a little farther apart!
Want a silly monster?
Try positioning one eye slightly higher than the other.
Want a grumpy monster?
We'll give him some eyebrows in a minute!
No two monsters have to look alike.
And honestly, that's what makes this project so much fun!
Step 6: Don't Forget Frankenstein's Pretzel Bolts!
What's Frankenstein's monster without those funny little bolts sticking out of the sides of his head?
We're using pretzel sticks!
Carefully insert a short pretzel piece into each side of your Rice Krispies rectangle, near the lower portion of the head.
If necessary, use a little melted chocolate to help hold them in place.
The pretzels give your monsters that classic Frankenstein look.
And here's a bonus!
They add a little salty crunch to all that sweet marshmallow goodness.
Sweet and salty?
Oh, yes, please!
Mimi's Tip: Add your pretzel bolts toward the end of decorating so they don't break while you're handling the treats.
Step 7: Give Your Monsters Some Personality!
Now grab your black writing icing!
This is where our little monsters really come alive.
Draw silly mouths, stitches, eyebrows, and scars.
I like making a few different expressions.
Some get big smiles.
Others get crooked stitched mouths.
A few get grumpy eyebrows.
And there's always that one monster who looks like he hasn't had enough sleep!
You can even draw a little scar across the forehead.
The important thing is to have fun.
Don't worry about making everything perfect.
After all, these are Halloween monsters!
Mimi's Rule: The sillier the face, the better the treat!
Allow your chocolate and icing to set completely before packaging.
A Little Monster-Making Fun for the Whole Family
This is one of those Halloween recipes that can be especially fun to make with the grandkids.
You can prepare the green Rice Krispies rectangles ahead of time and let everyone decorate their own little monster.
Set out bowls of candy eyeballs, chocolate sprinkles, pretzels, and writing icing.
Then let the creativity begin!
Just imagine all those little Frankenstein faces lined up together.
Some will be adorable.
Some will be downright hilarious.
And a few might look a little scary!
But that's Halloween!
Of course, grown-ups should handle the hot marshmallow mixture and melted chocolate, while little helpers can join in once everything is cool enough.
And don't be surprised if a few candy eyeballs disappear before they ever make it onto the treats.
I have no idea how that happens.
Wink, wink!
Packaging Our Little Monsters with PackFreshUSA
Now, you KNOW Mimi couldn't create all these adorable little monsters without finding the perfect packaging!
For our Halloween Rice Krispies treats, we're using PackFreshUSA's Black-and-Clear Stand-Up Pouches.
And let me tell you...
These little Frankenstein faces look fantastic against the black background!
The bright green treats really stand out, while the clear window allows everyone to see those funny little monster expressions.
The dark chocolate hair, candy eyeballs, and pretzel bolts make each pouch look like a miniature Halloween monster display.
Why I Love These Pouches for Halloween
Black-and-Clear Design: The black exterior makes those bright green monsters pop, while the clear window shows off their silly faces.
Stand-Up Gusset: Perfect for displaying your homemade Halloween goodies on a party table or countertop.
Resealable Zipper: Convenient for opening and closing the pouch.
Heat-Sealable Top: Provides an additional closure when properly sealed.
Wonderful for Gifting: Perfect for Halloween party favors, neighbor gifts, and special homemade treats.
Mimi's Packaging Tip
Before packaging your Frankenstein treats, make sure the chocolate hair and black writing icing have completely set.
You don't want all that hard work getting smeared inside the bag!
Choose a pouch large enough to hold the treats without crushing the candy eyeballs or breaking the pretzel bolts.
Remember, these are traditional soft and chewy Rice Krispies treats, not freeze-dried snacks.
They're best enjoyed fresh and shouldn't be treated as long-term storage foods.
For treats intended for gifting, follow appropriate food handling and storage practices. And if you're sharing them with others, remember to identify ingredients and allergens, including wheat, milk, and any allergens in the decorations.
Want to give your little monsters a frightfully fun finishing touch?
Peek-a-BOO! Show Off Your Halloween Treats in Black-and-Clear Stand-Up Pouches!
Explore our packaging at PackFreshUSA.com.
Mimi's Monster-Making Kitchen Tips
Keep the green bright! Add your food coloring to the melted marshmallows before mixing in the cereal.
Don't overheat the marshmallows! Low heat helps keep your treats soft and chewy.
Save that butter wrapper! It makes pressing the sticky mixture into the pan so much easier.
Cut rectangles, not squares! The taller shape gives your monsters that classic Frankenstein look.
Dip the chocolate hair first! Add your brown or black sprinkles while the chocolate is still wet.
Add the pretzel bolts last! This helps prevent them from breaking during decorating.
Let everything set before packaging! Nobody wants a Frankenstein monster with smeared chocolate hair!
And most importantly... Have fun!
The crooked smiles and silly expressions are what make these little monsters special.
⚡ It's ALIVE! A Little Halloween Magic from Mimi
I have to tell you, these Frankenstein Rice Krispies treats were an absolute blast to make.
There's something about turning a simple marshmallow treat into a silly little monster that just makes me smile.
And when you line them all up together?
Oh, my goodness!
It's like having a tiny army of green marshmallow monsters ready to take over the kitchen!
But don't worry.
I have a feeling they'll disappear long before Halloween night.
That's one of the things I love most about cooking and creating treats for family and friends.
It doesn't have to be complicated.
Sometimes all it takes is a little food coloring, some melted chocolate, and a handful of candy eyeballs to turn an ordinary recipe into a wonderful memory.
And those are the memories I love making.
Three Days of Halloween Treats — What a Monster-Sized Adventure!
Well, my little ghosts and goblins, we've made it through three days of Mimi's Halloween Rice Krispies Treat Adventures!
And what a sweet adventure it's been!
Day 1: Monster Mash Rice Krispies Treats — Classic marshmallow goodness with Reese's Pieces, Halloween sprinkles, and candy eyeballs.
Day 2: Triple-Layer Candy Corn Rice Krispies Treats — Three colorful layers with real candy corn melted into the marshmallows and extra candy on top.
Day 3: Frankenstein Rice Krispies Treats — Our adorable green monsters with chocolate hair, pretzel bolts, and silly little faces!
Three recipes.
Three different Halloween creations.
And enough marshmallow goodness to keep Mimi smiling for days!
But just because our Rice Krispies adventure is wrapping up doesn't mean the Halloween fun is over!
Oh, no!
You know Mimi...
There's always another experiment waiting in the kitchen!
So keep those Halloween molds handy, your candy bowls filled, and your spooky spirit alive.
Come back for more frightfully delicious treats, sweet surprises, and a little Halloween mischief!
Until next time, keep your marshmallows gooey, your treats delicious, and your Mylar sealed!
Hugs, giggles, and monster-sized marshmallow kisses!
Mimi
Your favorite Mylar-loving, marshmallow-melting grandma at PackFreshUSA
P.S. If you hear someone shouting "IT'S ALIVE!" from Mimi's kitchen, don't worry. It's probably just another batch of Frankenstein treats coming to life!
Mwahahaha!