
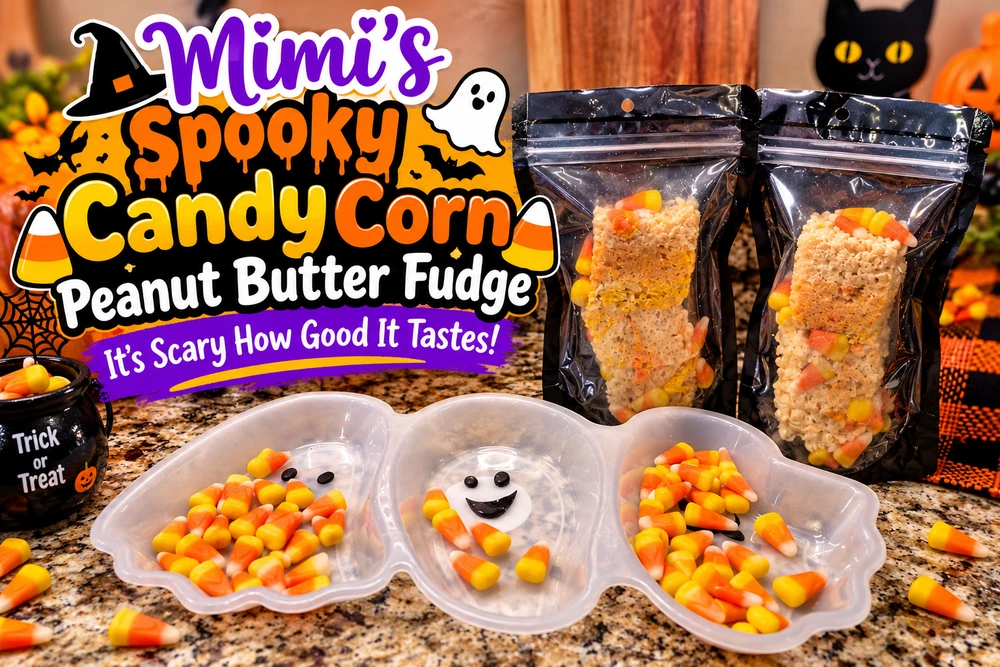
Mimi's Spooky Candy Corn Peanut Butter Fudge — It's Scary How Good It Tastes!
Posted by Mimi on Oct 23rd 2026
Mimi's Spooky Candy Corn Peanut Butter Fudge — It's Scary How Good It Tastes!
Candy corn, creamy peanut butter, white chocolate, and a little Halloween magic!
By Mimi | PackFreshUSA
Boo!
Welcome back to Mimi's Halloween kitchen, my little ghosts and goblins!
Just when you thought we'd had enough Halloween candy, Mimi decided to try something a little different.
And oh, my goodness!
What happens when you combine candy corn, peanut butter, sweetened condensed milk, and white chocolate?
A frightfully delicious Halloween fudge!
Now, I know what some of you are thinking.
"Candy corn? In FUDGE?"
Yes, my friends!
And trust me, this isn't your ordinary candy corn treat.
The peanut butter balances out some of that candy corn sweetness, while the white chocolate and sweetened condensed milk create a rich, creamy fudge.
And because Mimi just can't leave well enough alone, we're adding a milk chocolate drizzle and extra candy corn on top!
Because apparently, I decided Halloween needed just a little more sugar!
Mwahahaha!
Mimi's Spooky Candy Corn Peanut Butter Fudge
Ingredients
-
3 cups candy corn
-
1 can (14 oz.) sweetened condensed milk
-
1 cup creamy peanut butter
-
2 cups white chocolate chips or melting chocolate
-
1 cup milk chocolate chips or melting chocolate, for drizzling
-
Additional whole candy corn for decorating the top
You'll Also Need
-
A heavy-bottomed saucepan
-
A wooden spoon or silicone spatula
-
An 8 × 8-inch or 9 × 9-inch baking pan
-
Parchment paper
-
A microwave-safe bowl or double boiler for the chocolate drizzle
-
PackFreshUSA Black-and-Clear Stand-Up Pouches
Step 1: Prepare Your Pan
Line your baking pan with parchment paper, leaving a little extra hanging over the sides.
This makes lifting the fudge out of the pan much easier once it has set.
And believe me, when you're working with melted candy corn, you'll appreciate anything that makes cleanup easier!
Step 2: Slowly Melt That Candy Corn!
Here's where our Halloween magic begins!
Place your 3 cups of candy corn into a heavy-bottomed saucepan over very low heat.
Stir frequently as the candy corn begins to soften.
Mimi's Tip: Patience is the secret ingredient!
Candy corn contains a lot of sugar, and it can scorch if the heat gets too high.
If the candy corn is stubborn about melting, add a little of your measured sweetened condensed milk to help it soften.
Keep stirring gently until the mixture becomes smooth enough to blend with the remaining ingredients.
Remember, we're making fudge, not creating a Halloween volcano!
Step 3: Add the Peanut Butter and Sweetened Condensed Milk
Once your candy corn has softened, gradually stir in the remaining sweetened condensed milk.
Next, add your 1 cup of creamy peanut butter.
Continue stirring over low heat until everything is thoroughly combined.
The peanut butter adds a wonderful nutty flavor that helps balance the sweetness of the candy corn.
And the smell?
Oh, my goodness!
It's like Halloween and a peanut butter candy shop decided to have a party in Mimi's kitchen!
Step 4: Add the White Chocolate
Remove the saucepan from the heat.
Add your 2 cups of white chocolate chips or melting chocolate.
Stir gently until the chocolate has melted completely and the fudge mixture is smooth.
If needed, return the saucepan briefly to very low heat, stirring constantly. Avoid overheating the chocolate.
The mixture will be thick, sweet, and wonderfully creamy.
Now we're getting somewhere!
Step 5: Pour and Decorate
Carefully transfer your fudge mixture into your parchment-lined baking pan.
Spread it evenly with a spatula.
And because Mimi believes Halloween treats should look as fun as they taste...
Add extra whole candy corn across the top!
Gently press the candies into the surface while the fudge is still soft.
Those little pops of yellow, orange, and white make the fudge look extra festive.
Step 6: Add a Milk Chocolate Drizzle
Melt your 1 cup of milk chocolate in a microwave-safe bowl using short intervals, stirring between each one, or use a double boiler.
Once smooth, drizzle the chocolate over the top of your fudge.
You can make little zigzags, swirls, or spooky spiderweb-inspired patterns.
There's no need to be perfect.
After all, this is Mimi's Halloween kitchen!
Let the fudge cool, then refrigerate until firm enough to slice. Depending on the thickness and ingredients, it may need several hours to set.
Step 7: Slice into Spooky Little Squares
Once your fudge is firm, lift it out of the pan using the parchment paper.
Use a sharp knife to cut it into squares or rectangles.
Since this fudge is rich and sweet, smaller pieces make wonderful little Halloween treats.
And here's a trick I've learned over the years.
Wipe your knife clean between cuts for neater edges.
Now, of course, comes the most important part.
The taste test!
And if a few pieces disappear before packaging?
Well, that's just the Halloween spirits at work!
At least that's my story, and I'm sticking to it!
Packaging Our Halloween Fudge with PackFreshUSA
You know Mimi couldn't make another Halloween treat without finding the perfect packaging!
For this project, we're using PackFreshUSA's Black-and-Clear Stand-Up Pouches.
I absolutely love how the black background makes the candy corn colors stand out.
The clear window lets everyone peek inside at those beautiful fudge pieces, while the extra candy corn adds another festive touch.
Why I Love These Pouches
- Black-and-Clear Design: Perfect for Halloween, with a clear window that shows off the treats.
- Stand-Up Gusset: Great for displaying your homemade goodies.
- Resealable Zipper: Convenient for opening and closing the package.
- Heat-Sealable Top: Allows an additional protective closure when appropriate for the product.
Wonderful for Gifting: These make adorable Halloween treats for friends, neighbors, and family.
Mimi's Fudge Packaging Tips
Allow the fudge and chocolate drizzle to set completely before packaging.
Since this is a soft, rich homemade fudge containing dairy ingredients, keep it refrigerated and use food-safe packaging and handling practices. The stand-up pouch itself does not make the fudge shelf-stable.
If you're giving these as gifts, keep them chilled and remind recipients to refrigerate them.
And don't forget that this recipe contains peanuts and milk!
Want to give your Halloween goodies a frightfully fun finishing touch?
Peek-a-BOO! Show Off Your Halloween Treats in Black-and-Clear Stand-Up Pouches!
Find our packaging at PackFreshUSA.com.
Mimi's Spooky Fudge-Making Tips
Low and slow wins the race! Candy corn can scorch quickly, so use very low heat and stir often.
Use creamy peanut butter! It blends more easily into the fudge mixture.
Don't overheat the white chocolate! Add it after removing the pan from the heat whenever possible.
Decorate while the fudge is soft! This helps the extra candy corn stay in place.
Let the drizzle set! You don't want melted chocolate smearing inside your packaging.
Cut smaller squares! This fudge is rich, and a little piece goes a long way.
And most importantly, have fun!
Sometimes the most unexpected combinations turn into the best kitchen experiments.
It's Scary How Good It Tastes!
I have to tell you, this was such a fun Halloween experiment.
Who would have thought that melting candy corn into peanut butter, condensed milk, and white chocolate could create such a delicious little treat?
And when you add that milk chocolate drizzle and extra candy corn on top?
Oh, my goodness!
It's like Halloween decided to dress up as fudge!
One of my favorite things about cooking is experimenting with ingredients and discovering new combinations.
Sometimes things turn out exactly as planned.
Sometimes they surprise you.
And sometimes you create something so sweet and delicious that you start wondering what else you can melt into a saucepan!
Don't worry.
Mimi has plenty more ideas.
Don't Disappear! More Spooky Treats Are Coming!
Well, my little ghosts and goblins, another Halloween treat has made its way out of Mimi's kitchen!
We've had marshmallow monsters, colorful candy corn Rice Krispies treats, and now this wonderfully rich candy corn peanut butter fudge.
But the Halloween fun isn't over yet!
There are still plenty of spooky experiments waiting to happen.
So keep those candy bowls filled, your mixing spoons ready, and your Halloween spirit alive!
Come back for more frightfully delicious treats, sweet surprises, and a little Halloween mischief!
Until next time, keep your fudge sweet, your treats delicious, and your Mylar sealed!
Hugs, giggles, and candy corn kisses!
Mimi
Your favorite Mylar-loving, candy-melting grandma at PackFreshUSA
P.S. If you hear a strange cackle coming from Mimi's kitchen, don't worry. I'm probably just wondering what other Halloween candy I can turn into fudge!
Mwahahaha! ?♀️