
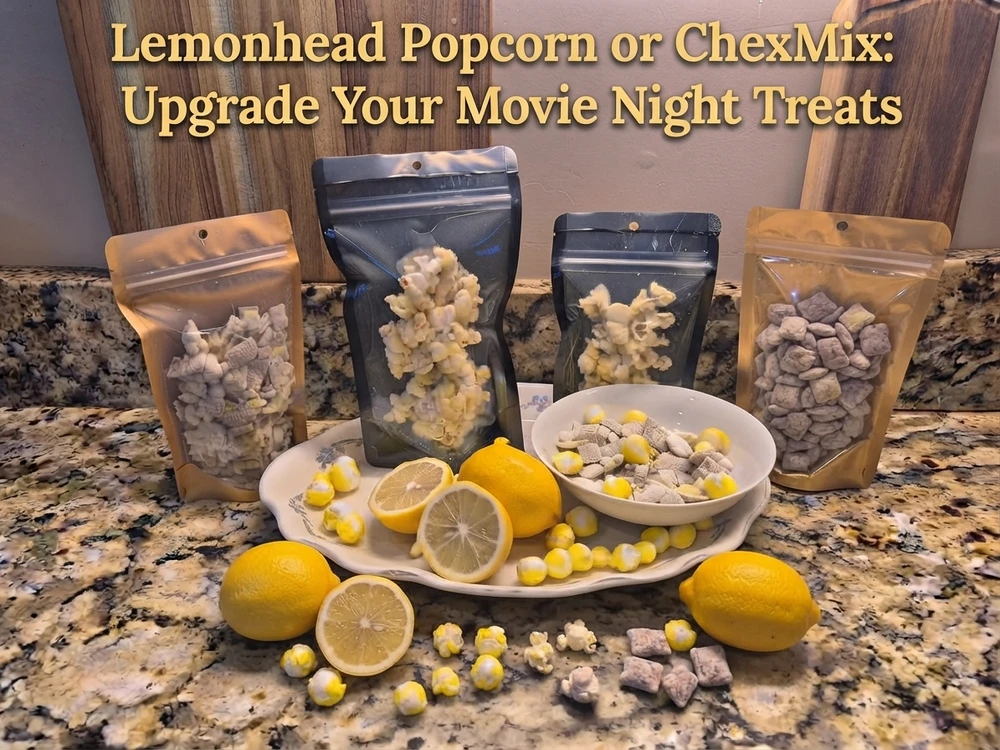
Lemonheads Popcorn or ChexMix: Upgrade Your Movie Night
Posted by Mimi on Oct 5th 2026
 There are some experiments in Mimi’s Kitchen that turn out good…and then there are the ones where you take that first bite and think, “Oh, we are definitely making this again!”
Freeze-dried Lemonheads were one of those experiments.
I already love that classic combination of sweet and sour, but freeze-drying takes Lemonheads to another level. They become light, crunchy, intensely lemony little bites that are wonderful all by themselves.
But you know Mimi—I couldn't stop there!
I started thinking about everything I could make with those crunchy Lemonheads, and before long we had Lemonhead White Chocolate Puppy Chow and Lemonhead White Chocolate Popcorn in the kitchen.
The Puppy Chow especially surprised me. It is sweet and sour at the same time, and absolutely delicious. The freeze-dried Lemonheads were the perfect touch.
So today I'm sharing the whole experiment—from preparing and freeze-drying the Lemonheads to making both recipes and finally choosing the right PackFreshUSA Stand-Up Pouch to protect all that wonderful crunch.
Grab the Lemonheads. We're heading to the kitchen!
How Mimi Freeze-Dries Lemonheads
Lemonheads have that hard candy shell, so I like to give them a little extra help before putting them into the freeze dryer.
For my method, we're going to use two sources of heat: a short oven pre-treatment followed by heated trays in the freeze dryer.
Step 1: Give Those Lemonheads a Little Heat
Preheat your oven to approximately 230–250°F.
Line a baking sheet with parchment paper or a silicone baking mat and spread the Lemonheads in a single layer, leaving a little room between them.
Place them in the oven for approximately 20 minutes.
Keep an eye on them! We're trying to warm and soften the candy, not burn it or melt everything into one giant Lemonhead.
Every oven is a little different, so start checking the candy before you reach that 20-minute mark, particularly if you're using the higher end of the temperature range.
Once they're ready, carefully remove them from the oven.
Now we're heading straight to the freeze dryer. (Start step 2 before you remove them)
Step 2: Get That Freeze Dryer HOT!
Before those Lemonheads go into the freeze dryer, we want the trays already nice and warm.
Turn on your freeze dryer and select Candy Mode.
Set the temperature between:
140–150°F
Then turn on your Tray Heat and allow the trays to heat for at least 10 minutes.
We don't want to take our nicely warmed Lemonheads out of the oven and immediately put them onto cold metal trays.
Once your freeze-dryer trays have been heating for at least 10 minutes, carefully transfer your prepared Lemonheads onto the trays.
Then start your Candy Mode cycle and let the freeze dryer do its thing!
Mimi’s Candy Tip
Candy can behave differently from batch to batch. Your particular freeze dryer, the candy itself, your room conditions, and even the age of the candy can affect your results.
Consider your first batch an experiment.
Take notes!
Write down your oven temperature, oven time, Candy Mode temperature, tray heat time, and final results. Once you find that sweet spot for your machine, you'll have your own perfect Lemonhead formula.
When the cycle is finished, check your candy before removing the entire batch.
If the Lemonheads aren't completely dry and crunchy, add additional dry time and check them again.
Package Those Lemonheads Quickly!
Once freeze-dried foods and candies are exposed to the air, moisture becomes the enemy of that wonderful crunch.
Don't leave your finished Lemonheads sitting on the counter all afternoon while everyone samples them!
Once they're ready for storage, package them promptly—or start making one of these recipes.
Actually…
You'd better hide a few Lemonheads first.
You're going to need them!
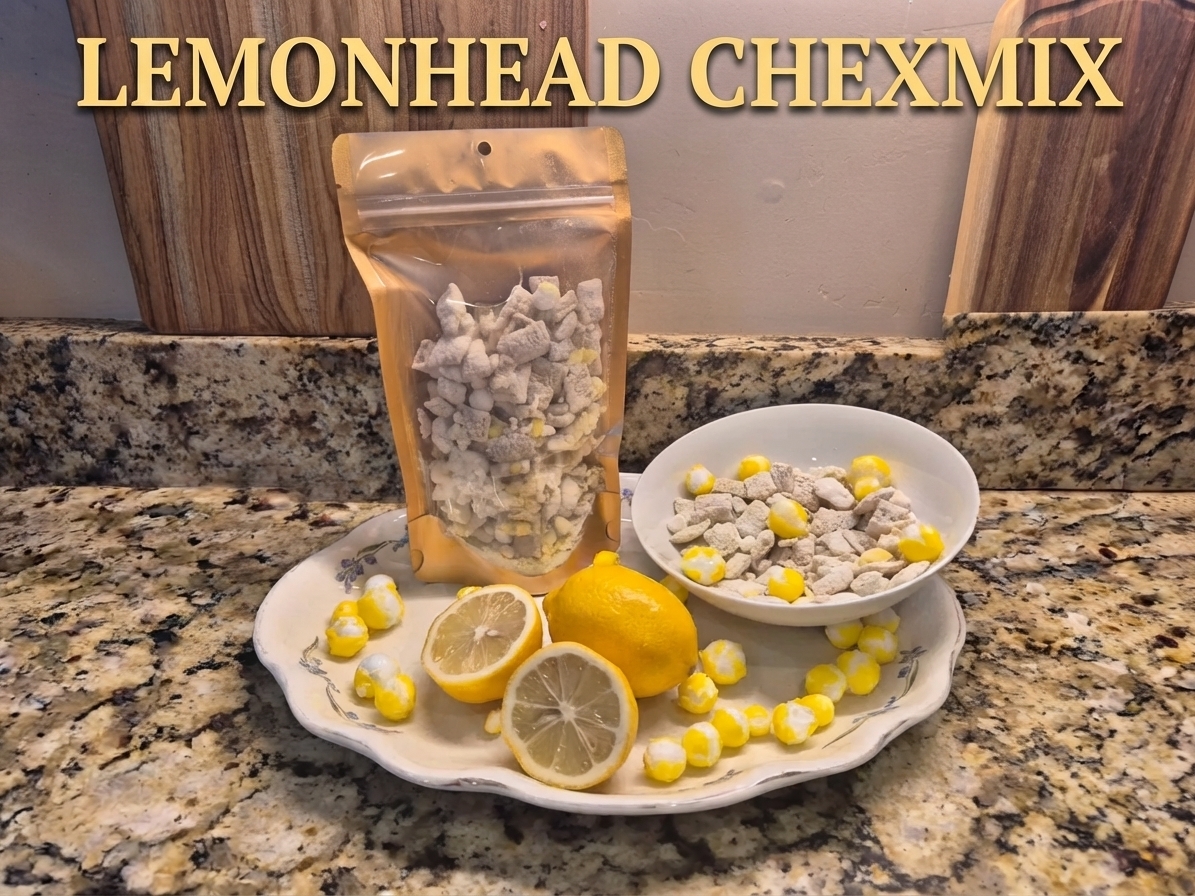 Mimi’s Lemonhead White Chocolate Puppy Chow
This recipe took a little experimenting.
My first version included lemon extract and had the fresh lemon zest mixed into the melted white chocolate.
After actually making it, I changed my mind!
The freeze-dried Lemonheads already bring plenty of lemon flavor, so we eliminated the lemon extract. I also discovered that adding fresh lemon zest directly to the white chocolate wasn't my favorite idea—the moisture can cause white chocolate to seize.
Instead, we're putting that beautiful fresh zest into our powdered-sugar mixture.
Much better!
Ingredients
-
8 cups Rice Chex cereal
-
12 oz white chocolate, melted
-
¾ to 1 cup powdered sugar
-
Zest of 2 lemons
-
2 cups freeze-dried Lemonheads, divided
-
1 cup finely crushed
-
1 cup coarsely crushed
-
-
1 cup white chocolate chips, optional
Directions
Place the Rice Chex cereal into a large mixing bowl.
Divide your freeze-dried Lemonheads. Finely crush 1 cup into a candy powder. Coarsely crush the remaining 1 cup, leaving plenty of delicious crunchy pieces.
In a large zip-top bag or covered container, combine the powdered sugar, finely crushed freeze-dried Lemonheads, and fresh lemon zest.
Slowly melt the white chocolate, stirring until completely smooth.
Pour the melted white chocolate over the cereal and gently fold until the cereal is evenly coated.
While the chocolate is still tacky, transfer the cereal into your powdered-sugar and Lemonhead mixture.
Seal the bag or container and gently shake until everything is coated.
Spread the Puppy Chow onto parchment paper and allow the white chocolate to set completely.
Once cool, gently toss in the remaining 1 cup of coarsely crushed freeze-dried Lemonheads.
Add the optional white chocolate chips if you'd like.
And then…
Taste one.
Okay, maybe two.
You get creamy white chocolate, fresh lemon, powdered sugar and crunchy cereal followed by those little explosions of sweet-and-sour freeze-dried Lemonheads.
This one is definitely Mimi Approved!
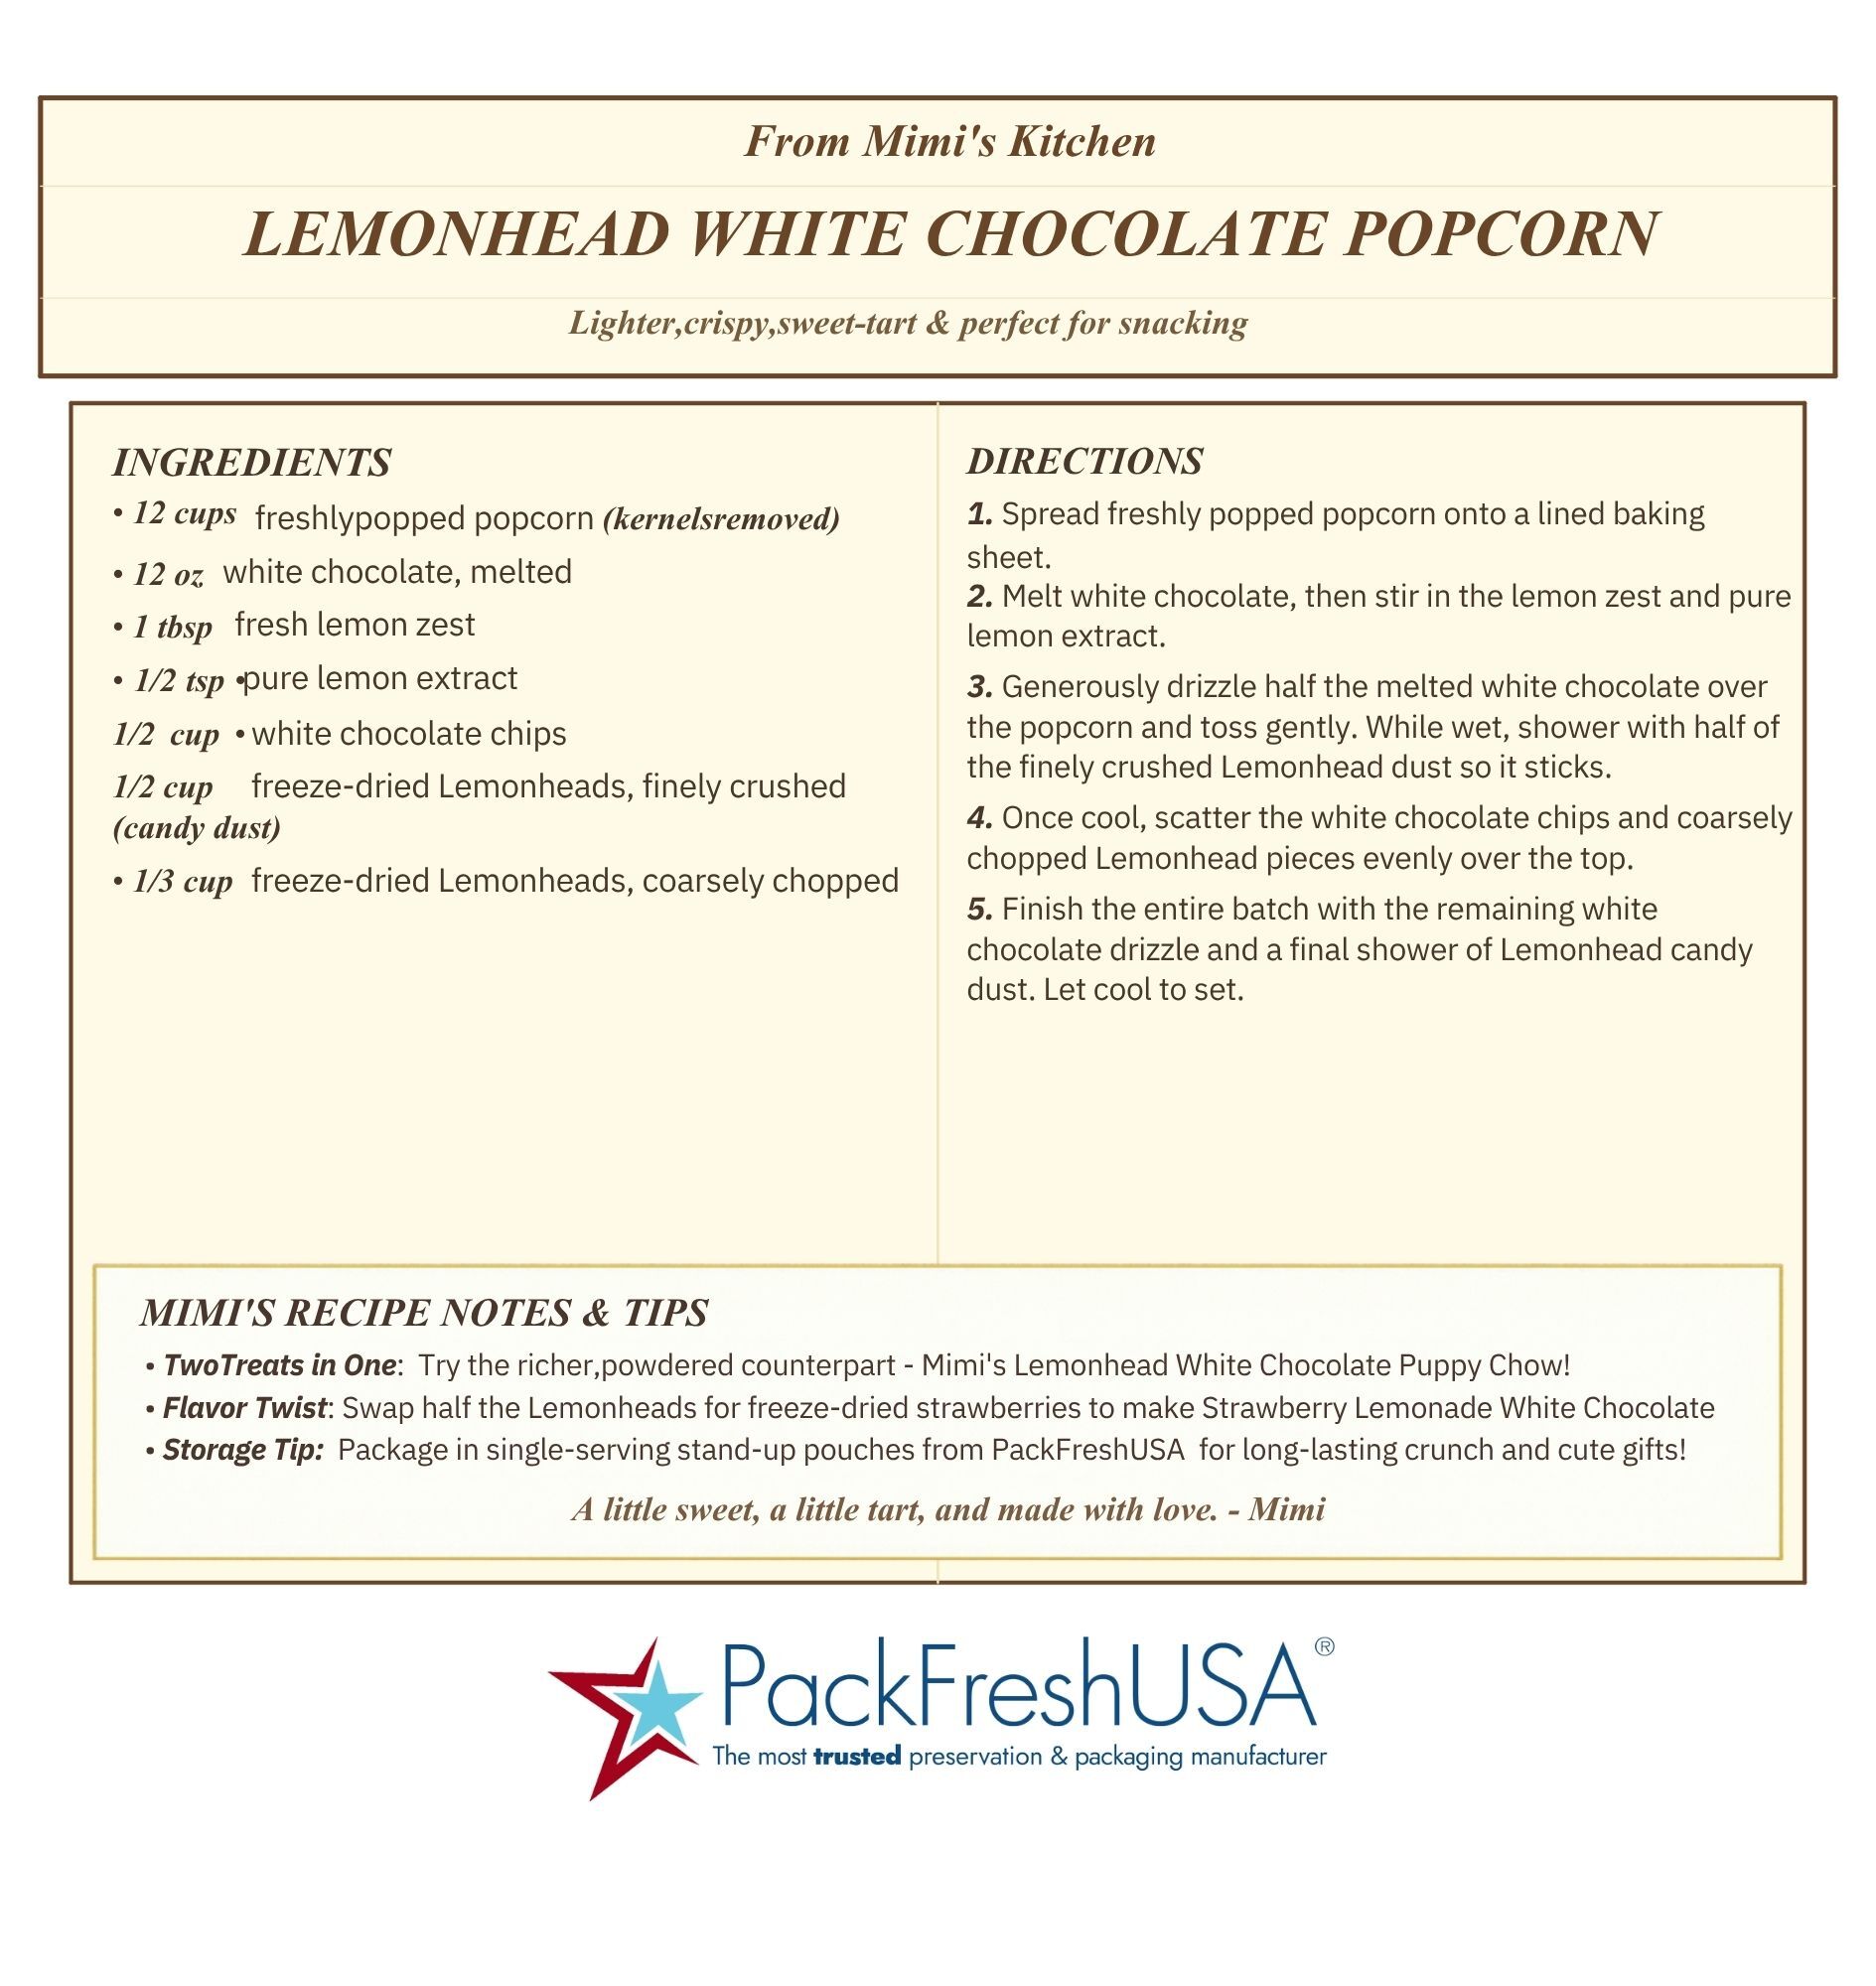
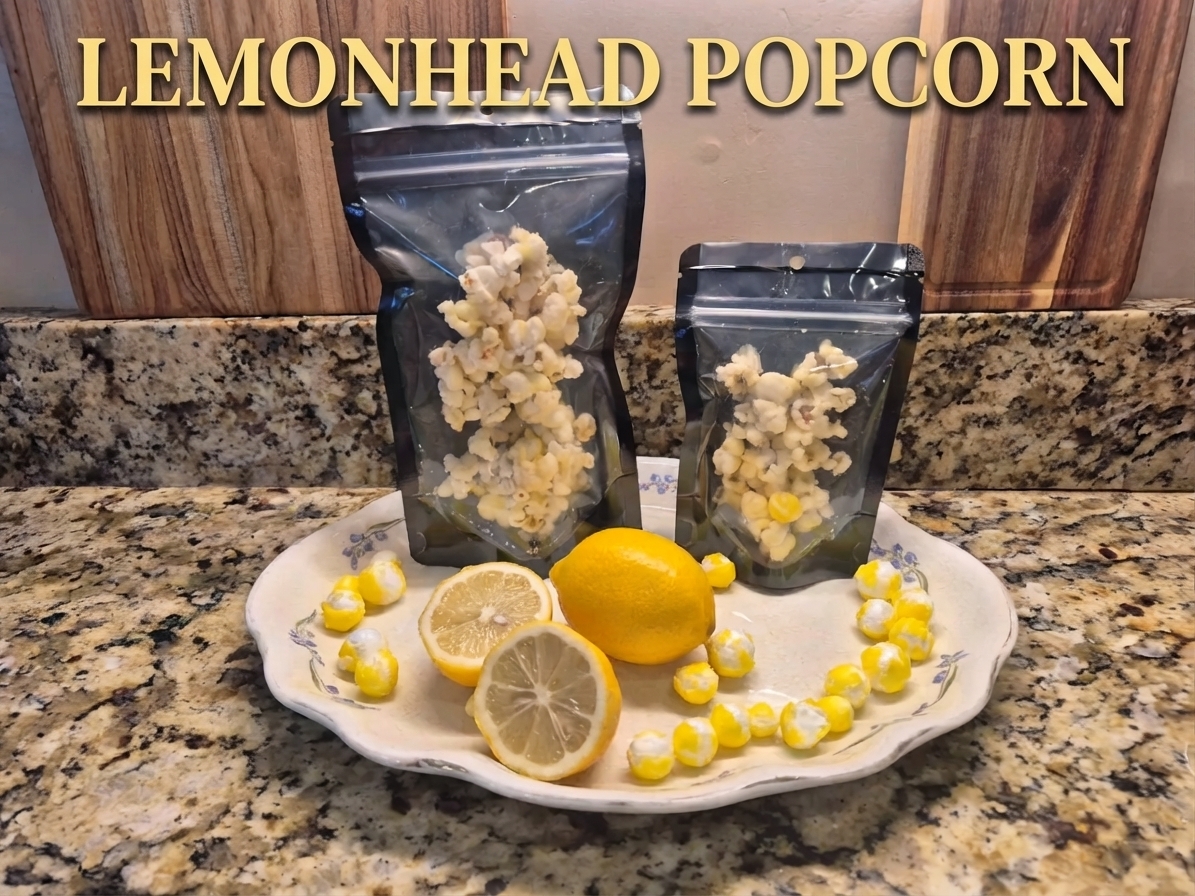 Mimi’s Lemonhead White Chocolate Popcorn
Now that you've tasted the Puppy Chow, let's use those freeze-dried Lemonheads one more way.
Popcorn!
The light crunch of freshly popped popcorn is a perfect match for white chocolate and that intense sweet-tart Lemonhead flavor.
Ingredients
-
12 cups freshly popped popcorn, unpopped kernels removed
-
12 oz white chocolate, melted
-
½ cup freeze-dried Lemonheads, finely crushed into candy dust
-
⅓ cup freeze-dried Lemonheads, coarsely chopped
-
½ cup white chocolate chips
-
Fresh lemon zest, optional
Directions
Spread the freshly popped popcorn onto a large parchment-lined baking sheet.
Slowly melt the white chocolate until smooth.
Drizzle approximately half of the melted white chocolate over the popcorn and gently toss.
While the chocolate is still wet, sprinkle some of the finely crushed freeze-dried Lemonhead candy dust over the popcorn so it sticks to the chocolate.
Drizzle the remaining white chocolate over the popcorn and gently toss again.
Sprinkle with the remaining Lemonhead candy dust.
Allow everything to cool completely and let the white chocolate set.
Finish with your coarsely chopped freeze-dried Lemonheads and white chocolate chips.
Now you've got creamy, sweet white chocolate, salty-crunchy popcorn and that unexpected POW of sour lemon.
Sweet + Sour + Salty + Crunchy = Yes, Please!
Mimi’s Tip: Don't package your popcorn while it's still warm. Let the popcorn and white chocolate cool completely before putting it into a pouch.
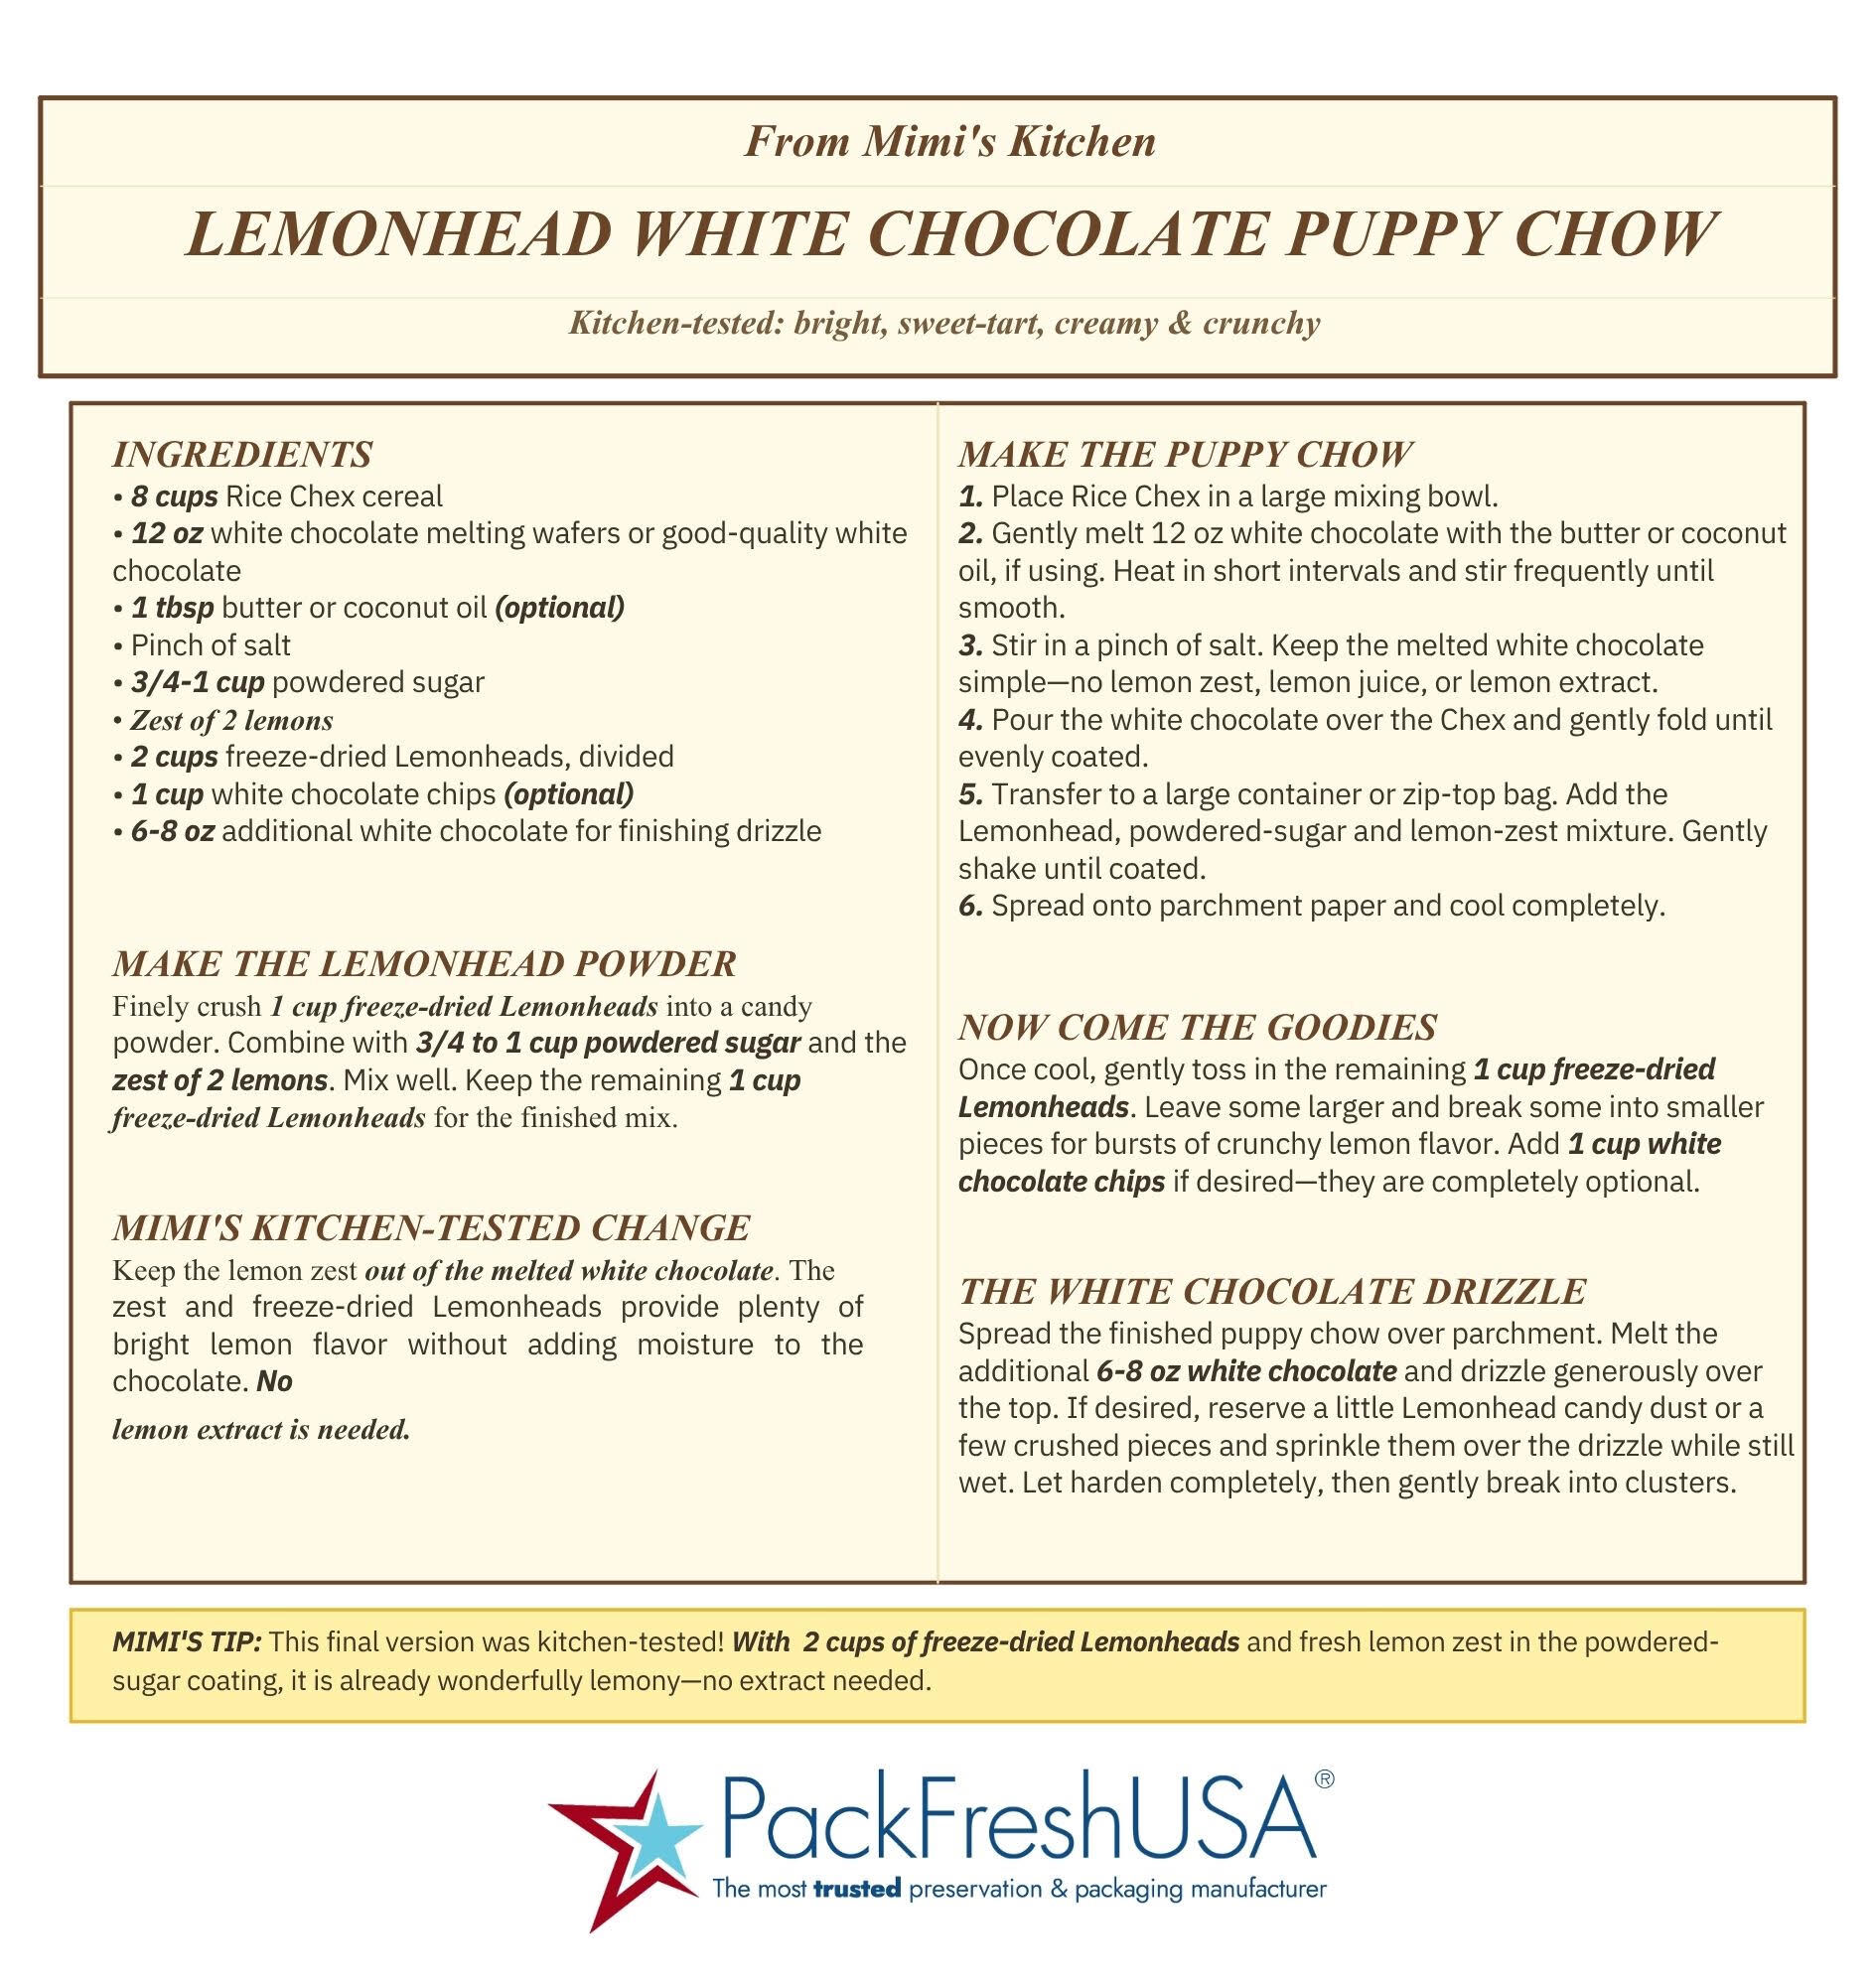
Print Mimi’s Lemonhead Recipe Cards
Sometimes I don't want to pull up an entire blog when I'm standing in the kitchen with white chocolate on my hands!
That's why I love recipe cards.
Print these, tuck them into your recipe box, and you'll have them ready the next time you freeze-dry a batch of Lemonheads.
Lemonhead White Chocolate Puppy Chow
Lemonhead White Chocolate Popcorn
Mimi’s Tip
Make a nice big batch of freeze-dried Lemonheads.
Save some for snacking, crush some for your Puppy Chow, and save another portion for the popcorn.
One freeze-dryer experiment—three treats!
Now Let's Talk Packaging
We've spent all this time creating that beautiful crunch.
Now we need to protect it!
Freeze-dried candy, Puppy Chow, and popcorn all have something in common: we don't want humidity stealing that crunch.
That's where choosing the right packaging becomes important.
PackFreshUSA offers Stand-Up Pouches in several sizes, colors, and film combinations that work beautifully for snack foods and freeze-dried treats.
They give you the convenience of a zipper for reopening while also allowing you to heat-seal above the zipper for a professional, tamper-evident finished package.
SHOP PACKFRESHUSA STAND-UP POUCHES
Which Stand-Up Pouch Size Should I Use?
Here's something I've learned from packaging freeze-dried foods:
Don't judge the package by weight alone!
Freeze-dried candy is incredibly lightweight but can take up a surprising amount of room.
Popcorn is even more deceptive.
That's why I recommend testing your actual finished product in several pouch sizes before ordering a large quantity.
I used both the Medium and Large Gold/Clear and 5 mil Black/Clear Stand-up Pouches
As a starting point:
Small Stand-Up Pouch — 4" × 6" × 2.5"
Great for samples, party favors, smaller portions, or individual snack sizes.
Medium Stand-Up Pouch — 5" × 8.5" × 3"
A great place to start testing for freeze-dried candy and smaller retail portions of Puppy Chow.
Large Stand-Up Pouch — 6" × 9.5" × 3.5"
The extra room works nicely for bulkier snacks and larger portions.
X-Large Stand-Up Pouch — 7.5" × 11.5" × 3.5"
When you're packaging something light and bulky—hello, popcorn!—sometimes you simply need the extra room.
Still not sure?
That's exactly why samples are so helpful.
Put your actual product inside the pouch and see how it looks before deciding.
Let Those Lemonheads Show Off!
For colorful products like freeze-dried candy, packaging can become part of your presentation.
A clear or clear-front Stand-Up Pouch lets people see what's inside.
Imagine those bright yellow freeze-dried Lemonheads sitting on a farmers-market table where customers can actually see that crazy crunchy texture.
Or a beautiful white-and-yellow Lemonhead Puppy Chow showing through the front of the package.
PackFreshUSA offers several Stand-Up Pouch styles, including clear and clear-front combinations such as:
-
Clear
-
Silver/Clear
-
Black/Clear
-
Kraft/Clear
-
Gold/Clear
- White/Clear
- Pink/Clear
For products needing greater protection from light, a fully metallized pouch may be a better choice.
That's another reason I recommend thinking about what you're packaging, how long you want to store it, and how the product will be displayed before selecting your pouch.
What About Oxygen Absorbers?
Oxygen and moisture are two different things, and your finished product matters when determining your packaging system.
For appropriate dry foods, PackFreshUSA Stand-Up Pouches can be heat-sealed and paired with oxygen absorbers.
But don't assume that adding the biggest oxygen absorber possible is automatically better.
Choose an absorber appropriate for the pouch, the amount of food, and the amount of remaining air.
And remember: with something like crispy freeze-dried candy, moisture control is extremely important because moisture can quickly affect that beautiful texture.
If you're developing a product for sale, test your finished recipe and packaging combination before establishing your shelf-life expectations.
From Mimi’s Kitchen to a Farmers Market—or Even a Business
This is one of the things I love most about experimenting with food preservation.
Sometimes you're just standing in your kitchen thinking:
“I wonder what would happen if I freeze-dried this?”
And suddenly you've created something people can't stop eating.
For a cottage-food maker, freeze-dried candy business, gourmet popcorn company, bakery, farmers-market vendor, gift-basket business, or specialty snack company, packaging is part of taking that kitchen creation to the next level.
You want packaging that protects your product.
You want something that looks professional.
And eventually, you want customers to recognize your brand before they even read the label.
PackFreshUSA offers retail and wholesale packaging options for businesses as they grow. And when you're ready to take that next step, custom packaging and branded packaging options can help turn a homemade favorite into a professional retail product.
Start with a recipe.
Find the perfect crunch.
Choose the right package.
And who knows where that little kitchen experiment might take you?
A Little Note From Mimi
Some of my favorite recipes haven't started with a carefully written plan.
They've started with:
“Let's see what happens.”
That's exactly what happened with these Lemonheads.
I freeze-dried them.
I tasted them.
Then I started thinking about what else I could do with them.
Before I knew it, there was Puppy Chow on one side of my kitchen and Lemonhead popcorn on the other—and I was already thinking about what flavor I wanted to try next.
That's the fun of learning to preserve food and experimenting in the kitchen.
Don't be afraid to try something new.
Sometimes it works.
Sometimes you learn what not to do.
And sometimes you accidentally create something absolutely delicious.
Until our next adventure...
Keep experimenting, keep preserving, and keep something delicious tucked away for later.
Much love,
Mimi
From Mimi’s Kitchen at PackFreshUSA