
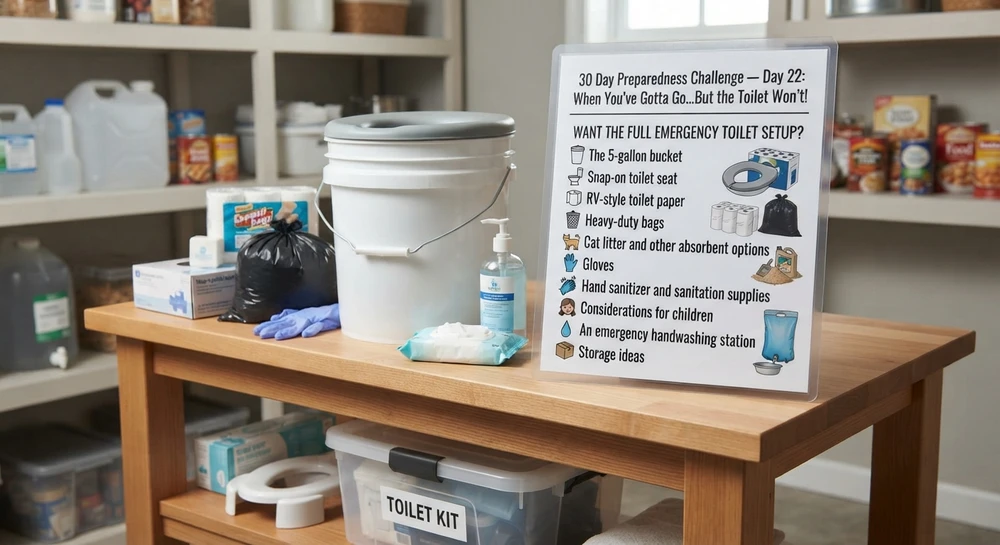
30 Day Preparedness Challenge — Day 22: When You’ve Gotta Go…But the Toilet Won’t!
Posted by Mimi on Sep 22nd 2026
30 DAY PREPAREDNESS CHALLENGE — DAY 22
WHEN YOU’VE GOTTA GO…BUT THE TOILET WON’T!
Okay, my preparedness friends.
Today we're going to talk about something that isn't glamorous.
It isn't cute.
It probably isn't going to make the prettiest preparedness photo.
But when you've gotta go...
YOU'VE GOTTA GO.
What happens if you turn on the faucet and there's no water?
Or your toilet can't be flushed because of a water outage, sewer problem, damaged plumbing, flooding, earthquake, or another emergency?
Most of us don't think much about our toilets.
Until they don't work.
And THAT is exactly why today's little preparedness challenge matters.
TODAY'S CHALLENGE: MAKE AN EMERGENCY TOILET PLAN
You don't have to build an entire emergency bathroom today.
We're keeping with our theme:
ONE LITTLE THING AT A TIME.
Today I want you to figure out:
What would my family do if we couldn't use our toilets?
If your answer is...
“Ummmm...”
Perfect.
That's why we're doing this today.
OPTION #1 — THE 5-GALLON BUCKET TOILET
One of the simplest emergency toilet options is something many of us already have:
A sturdy 5-gallon bucket.
You can purchase a toilet-seat-style lid made to fit a bucket, or use a commercially made portable toilet setup.
Your goal is simple:
STABLE. ACCESSIBLE. EASY TO USE.
And perhaps clearly mark your emergency toilet bucket so nobody decides it's the perfect bucket for washing the car.
HEAVY-DUTY TRASH BAGS ARE IMPORTANT
Keep heavy-duty trash bags with your sanitation supplies.
They're useful for your bucket toilet, containing waste, cleanup, and other sanitation needs during an emergency.
You'll also want some type of appropriate absorbent or waste-solidifying material.
Depending on what you have available, that might include products specifically designed to solidify liquid waste or an absorbent material such as cat litter or pine pellets.
These can help absorb liquid and make waste easier to manage.
Always follow local public-health or emergency instructions for handling and disposing of human waste.
MIMI'S BACKUP PLAN — USE THE TOILET WITHOUT FLUSHING
Here's another option I want my family to know.
If the water is off, but the toilet and bathroom themselves are otherwise safe to use, a heavy-duty trash bag can provide a temporary backup.
Instead of using the toilet normally:
- Remove standing water from the toilet bowl if needed.
- Place a heavy-duty trash bag inside the toilet bowl, leaving plenty of the bag over the sides.
- Lower the toilet seat over the bag to help hold it in place.
- Add some absorbent or waste-solidifying material.
- Use the lined toilet as a temporary emergency toilet.
- DO NOT FLUSH THE BAG OR ITS CONTENTS.
- Wearing disposable gloves, carefully remove and securely close the bag when necessary.
- Follow local emergency/public-health instructions for temporary storage and disposal.
This gives you the familiar seat and stability of your regular toilet without relying on the water supply for flushing.
IMPORTANT:
If local officials tell you not to use the sewer system, follow those instructions.
And if the bathroom or toilet is unsafe because of flooding, sewage backup, structural damage, or another hazard, don't use it.
The goal is to have options—not create another emergency.
MIMI'S PICK — RV-STYLE TOILET PAPER
I like keeping RV-style toilet paper with my emergency sanitation supplies.
RV and marine toilet paper is designed to break down more readily than many standard household toilet papers, which can make it a useful choice for portable and emergency sanitation setups.
And here's another Mimi trick:
KEEP IT DRY!
Toilet paper isn't particularly helpful after it's gotten wet. ?
I like the idea of placing several rolls inside a large PackFreshUSA Stand-Up Pouch.
It helps protect the toilet paper from:
- Moisture
- Dust and dirt
- Bugs
- General storage mess
Zip it closed, label it EMERGENCY SANITATION, and store it with your supplies.
DON'T FORGET THE GLOVES
Keep disposable gloves with your sanitation kit.
They're useful when handling waste, changing liners, cleaning surfaces, or dealing with contaminated materials.
But remember:
GLOVES DON'T REPLACE HANDWASHING.
Remove gloves carefully, avoid touching your face while handling waste, and wash your hands thoroughly with soap and clean water whenever possible.
WHAT ABOUT HANDWASHING?
This is one of the reasons our Day 3 water storage challenge mattered.
Stored water isn't only for drinking.
We may also need water for:
- Food preparation
- Handwashing
- Cleaning
- Sanitation
Your emergency sanitation supplies should include:
✔️ Soap
✔️ Hand sanitizer
✔️ Paper towels
✔️ Disposable gloves
✔️ Cleaning/sanitizing supplies
When soap and safe water are available, wash your hands thoroughly. Hand sanitizer can be an important backup when they aren't readily available.
ADD SOME CLEANUP SUPPLIES
Your sanitation kit should also contain basic cleaning supplies appropriate for your household.
Keep products in their original containers when possible and follow the label directions.
NEVER MIX CLEANING CHEMICALS
unless the manufacturer's directions specifically say the combination is safe.
More isn't always better.
PERSONALIZE YOUR SANITATION KIT
Every household is different.
Think about the people who actually live in YOUR home.
Do you need:
- Diapers?
- Baby wipes?
- Baby-care supplies?
- Menstrual products?
- Extra toilet paper?
- Personal hygiene supplies?
- ♿ Accessibility items?
- Supplies for an older family member?
Preparedness works best when it is built around your actual household.
DON'T FORGET THE PETS
Our pets have sanitation needs too.
Remember our Day 8 Pet Grab-N-Go Bag?
Depending on your pets, consider keeping:
- Waste bags
- Cat litter
- Disposable gloves
- Paper towels
- Cleanup supplies
If you have cats, think about what you would do if you suddenly couldn't access their normal litter setup.
Again...
HAVE A PLAN B.
KEEP EVERYTHING TOGETHER
One of my favorite preparedness tricks is simple:
STORE YOUR SANITATION SUPPLIES INSIDE YOUR CLEAN, UNUSED EMERGENCY BUCKET.
You might put inside:
✔️ Heavy-duty trash bags
✔️ RV-style toilet paper
✔️ Disposable gloves
✔️ Hand sanitizer
✔️ Soap
✔️ Paper towels
✔️ Baby wipes
✔️ Simple instructions
Keep your absorbent or waste-solidifying material nearby if it won't fit inside.
Put the toilet-seat lid on top.
Now instead of having emergency sanitation supplies scattered throughout six closets, three bathrooms, and a garage...
YOU HAVE A KIT.
Label it:
EMERGENCY SANITATION KIT
Nobody gets to borrow that bucket to wash the car. ?
ADD A SIMPLE INSTRUCTION SHEET
This is one of those preparedness situations where you might not be the person setting everything up.
Write down basic instructions and put them inside your kit.
That way another adult, teenager, family member, or caregiver can figure out what to do.
Keep it simple.
WHERE WOULD YOU PUT IT?
Think about this BEFORE you need it.
Where could you safely set up an emergency toilet?
Consider:
✔️ Privacy
✔️ Ventilation
✔️ Handwashing
✔️ Cleanup
✔️ Keeping waste away from food preparation areas
✔️ Accessibility for everyone in your household
You don't necessarily need to set it up today.
Just know where it could go.
ONE MORE IMPORTANT THING
Just because your toilet can flush doesn't always mean it should be flushed during an emergency.
Damaged sewer lines, flooding, wastewater problems, or instructions from local authorities may change what you should do.
FOLLOW LOCAL EMERGENCY AND PUBLIC-HEALTH INSTRUCTIONS.
WANT THE FULL EMERGENCY TOILET SETUP?
I've already put together a much more detailed guide on building your own DIY emergency toilet.
It covers:
- The 5-gallon bucket
- Snap-on toilet seat
- RV-style toilet paper
- Heavy-duty bags
- Cat litter and other absorbent options
- Gloves
- Hand sanitizer and sanitation supplies
- Considerations for children
- An emergency handwashing station
- Storage ideas
You can read the complete PackFreshUSA guide here:
Crafting Your DIY Emergency Toilet — PackFreshUSA
https://packfreshusa.com/blog/crafting-your-diy-emergency-toilet-/
Today's challenge isn't about rebuilding that entire kit.
It's about making sure you know the plan.
TODAY'S 10-MINUTE CHALLENGE
Before you call Day 22 — DONE, see how many of these you can check off:
☐ Decide what your emergency toilet will be
☐ Find or purchase a 5-gallon bucket if needed
☐ Consider a snap-on toilet seat
☐ Put heavy-duty trash bags with your supplies
☐ Add absorbent or waste-solidifying material
☐ Store RV-style toilet paper and keep it dry
☐ Add disposable gloves
☐ Add soap and hand sanitizer
☐ Add cleaning/sanitizing supplies
☐ Add household-specific hygiene supplies
☐ Think about pet sanitation
☐ Know how you could line your regular toilet with a heavy-duty bag as a backup
☐ Decide where an emergency toilet could safely be set up
☐ Keep your sanitation supplies together
☐ Read our full DIY Emergency Toilet guide
You don't have to complete everything today.
Even gathering a bucket, some heavy-duty bags, gloves, and toilet paper puts you farther ahead than you were yesterday.
DAY 22 — DONE!
Nobody wants to think about what happens when the toilet stops working.
But I can promise you this:
YOU REALLY DON'T WANT TO FIGURE IT OUT AFTER SOMEONE ALREADY HAS TO GO.
A bucket.
A bag.
Some toilet paper.
A little sanitation planning.
That's preparedness.
Not glamorous.
Not complicated.
But VERY useful.
ONE LITTLE THING AT A TIME.
— Mimi
PackFreshUSA
TOMORROW — DAY 23
We're doing a Home Hazard Walk-Through.
We're going to look for the little things around our homes that could become BIG problems during an emergency:
Blocked exits.
Heavy objects.
Unstable shelving.
Trip hazards.
And a few of those things we've walked past approximately 4,782 times while saying...
“I really need to fix that.”
Tomorrow, we're finally looking at them!