
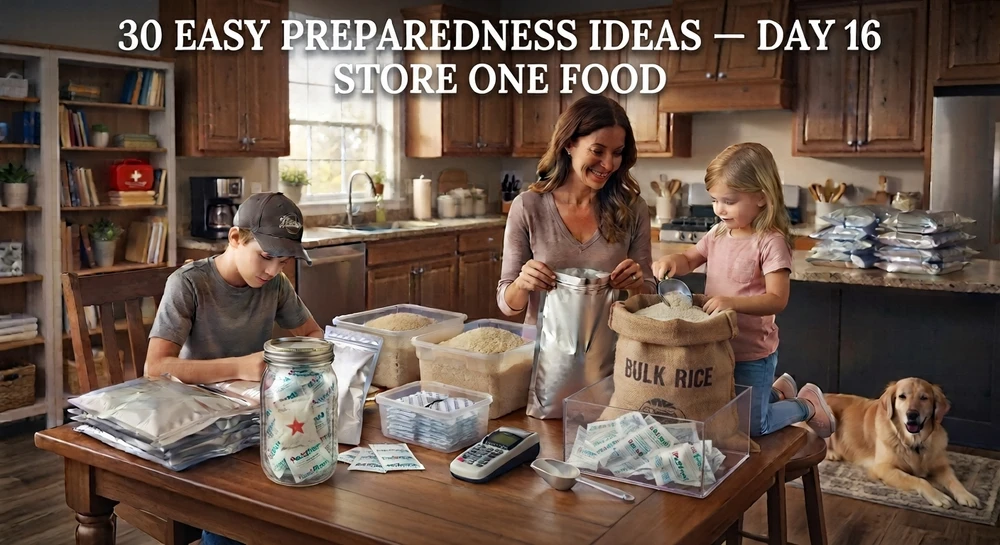
30 EASY PREPAREDNESS IDEAS — DAY 16 STORE ONE FOOD FOR THE FUTURE!
Posted by Mimi on Sep 16th 2026
30 EASY PREPAREDNESS IDEAS — DAY 16
STORE ONE FOOD FOR THE FUTURE!
Yesterday we celebrated making it HALFWAY through our 30 Easy Preparedness Ideas Challenge!
Today we're heading into one of my favorite places...
THE PANTRY!
But before anyone starts thinking they need to run out and buy 200 pounds of rice...
STOP RIGHT THERE!
Today's challenge is NOT to build your entire long-term food storage in one afternoon.
We're doing exactly what we've been doing all month:
ONE LITTLE THING AT A TIME.
Today's challenge is simple:
CHOOSE ONE DRY FOOD YOUR FAMILY ALREADY EATS AND PACKAGE IT FOR LONGER-TERM STORAGE.
One bag.
One food.
One preparedness job.
Let's do it!
FIRST RULE: STORE WHAT YOU EAT
If your family doesn't eat lentils, you probably don't need to celebrate Preparedness Month by buying 50 pounds of lentils.
Choose something your household already uses.
For example:
- White rice
- Dry beans
- Dry pasta
- Oats
- Wheat berries
Today we're concentrating on learning the process rather than filling an entire pantry.
Mimi's Tip:
STORE WHAT YOU EAT. EAT WHAT YOU STORE.
That's how food storage becomes part of your regular pantry instead of a collection of mysterious food nobody wants to eat.
WHAT DO YOU NEED?
This is the easy part.
- One appropriate dry food
- A quality Mylar bag
- An appropriately sized oxygen absorber
- Something to heat seal your Mylar
- A permanent marker or label
You can shop PackFreshUSA's Mylar Bags here:
https://packfreshusa.com/shop/
And our Oxygen Absorbers here:
https://packfreshusa.com/shop/oxygen-absorbers/
EVEN EASIER: PackFreshUSA also offers Mylar Bag + Oxygen Absorber Combination Sets, so you don't have to guess which absorber goes with the bag.
You can find those in our Mylar and food-storage collection here:
https://packfreshusa.com/shop/combination-sets/
STEP 1 — CHOOSE ONE FOOD
Today we're choosing ONE.
Maybe your family eats white rice several times a week.
Perfect.
Maybe it's beans.
Great.
Maybe pasta is always in your pantry.
Wonderful.
PICK SOMETHING THAT BELONGS IN YOUR REAL PANTRY.
Food storage should contain foods your family knows how to prepare and will actually eat.
STEP 2 — CHOOSE YOUR MYLAR BAG & OXYGEN ABSORBER
Choose a Mylar bag that makes sense for the amount of food you're storing.
For smaller quantities, you might use a pint, quart or 2-quart bag.
For larger amounts, a gallon bag may make more sense.
And remember:
BIGGER ISN'T ALWAYS BETTER.
Think about how you'll use the food when you eventually open it.
Several smaller packages may work better for your household than one enormous package.
Then pair the bag with an appropriately sized oxygen absorber.
As a simple PackFreshUSA guide, I commonly use:
Quart Mylar (4 cup) — 200cc Oxygen Absorber
2-Quart Mylar (8 cup) — 300cc Oxygen Absorber
Gallon Mylar (16 cups) — 500cc Oxygen Absorber
Different foods leave different amounts of air space inside the package. Rice packs tightly, while foods like pasta leave more air between the pieces.
That's one reason I like keeping the system simple.
Mimi's Tip: Our PackFreshUSA Combination Sets make this especially easy because we've already paired the bags with oxygen absorbers for you.
STEP 3 — GET EVERYTHING READY FIRST!
Before opening your oxygen absorbers:
GET ORGANIZED.
Have your:
✔️ Food ready
✔️ Mylar bags filled
✔️ Heat-sealing equipment ready
✔️ Marker or labels ready
Oxygen absorbers begin working once they're exposed to air.
So don't open them and THEN decide it's a good time to go searching for your iron. ?
STEP 4 — FILL YOUR BAG
Add your dry food.
Don't fill the bag all the way to the top.
Leave enough clean, flat Mylar to make a good heat seal.
Gently settle the food and make sure the sealing area is:
CLEAN + FLAT.
Food particles or deep wrinkles can interfere with your seal.
STEP 5 — PARTIALLY SEAL
Here's the method I like to use.
Seal about 70% of the top first.
Leave yourself a small opening.
Then add your oxygen absorber.
Gently remove some of the excess air.
Then...
FINISH THE SEAL!
This helps reduce the amount of time your oxygen absorber is sitting exposed while you're working.
STEP 6 — HEAT SEAL YOUR MYLAR
For long-term food storage, your Mylar needs a good heat seal.
If you're using a zipper-style bag, remember:
THE ZIPPER IS FOR CONVENIENCE. THE HEAT SEAL IS FOR STORAGE.
My favorite ways to seal Mylar are actually very simple.
HAIR STRAIGHTENER
I use mine around 375°F. If yours isn't digital, I generally use the highest setting.
CLOTHING IRON
Use the cotton/linen setting with NO STEAM.
Here's another Mimi trick:
I flip a cookie sheet upside down and use the flat bottom as my little ironing board.
Simple works!
Whatever method you use, make a strong, even seal across the entire opening.
CHECK YOUR SEAL
Take a few seconds and actually LOOK at it.
Is it:
✔️ Sealed from edge to edge?
✔️ Clean?
✔️ Smooth?
✔️ Free from food particles?
✔️ Free from deep wrinkles running through the seal?
A deep wrinkle running from the inside of the bag through the sealed area can create a tiny channel.
Think of it like a little straw.
WE DON'T WANT THAT.
If you aren't happy with your seal and have enough room, make another seal above it.
STEP 7 — LABEL IT!
Don't skip this one.
Write:
WHAT IT IS
WHITE RICE
WHEN YOU PACKED IT
SEPTEMBER 2026
And I also like adding:
OXYGEN ABSORBER SIZE
500cc OAP
So your bag might say:
WHITE RICE
PACKED: SEPT 2026
500cc OAP
Future Mimi doesn't need to play:
“GUESS WHAT'S IN THE SILVER BAG!”
Label it now.
“BUT MY BAG DIDN'T VACUUM DOWN!”
Don't panic.
AN OXYGEN ABSORBER IS NOT A VACUUM SEALER.
An oxygen absorber removes oxygen from inside the sealed package.
It doesn't remove every gas inside the bag.
Some foods may make the Mylar pull in very tightly.
Others may not.
So don't judge whether your oxygen absorber worked only by whether your bag looks vacuum sealed.
WAIT! NOT EVERY FOOD GETS AN OXYGEN ABSORBER
This is important.
Today's challenge is for appropriately dry foods suitable for oxygen-reduced storage.
Two really easy ones to remember:
SUGAR — NO OXYGEN ABSORBER.
SALT — NO OXYGEN ABSORBER.
Neither needs one, and sugar can turn into a pretty impressive sugar brick.
Also, don't automatically add an oxygen absorber to foods with significant moisture.
If you're unsure whether a particular food is appropriate for long-term storage with an oxygen absorber:
ASK BEFORE YOU PACK IT.
PROTECT YOUR FOOD
Mylar gives us excellent barrier protection, but the bag can still be physically damaged.
For larger amounts or longer-term storage, you may want to place your sealed Mylar inside a food-safe bucket or another sturdy protective container.
I like to think of it this way:
MYLAR = BARRIER PROTECTION.
BUCKET = PHYSICAL PROTECTION.
Then store your food somewhere:
✔️ Cool
✔️ Dry
✔️ Away from direct sunlight
✔️ Protected from pests
✔️ Protected from extreme temperatures
GET THE KIDS INVOLVED!
This can be another great family preparedness project.
Kids can help:
- Scoop the food
- Make labels
- Write the date
- Put finished bags into buckets
- Add the food to your pantry inventory
Adults handle the hot sealing equipment.
But kids can absolutely learn:
“This is food we're putting away for our family.”
When children participate in preparedness, preparedness becomes normal.
MIMI'S TIP: DON'T TRY TO DO EVERYTHING TODAY
This is where people get overwhelmed.
They think:
“I NEED A YEAR'S WORTH OF FOOD!”
They calculate everything they'd need.
They look at the total.
And then...
They do nothing.
So let's ask a different question:
“WHAT CAN I PACKAGE TODAY?”
One bag of rice.
Next time, beans.
Then pasta.
Then oats.
Then another bag of rice.
ONE BAG BECOMES A SHELF.
ONE SHELF BECOMES A PANTRY.
ONE LITTLE THING AT A TIME.
TODAY'S EASY PREPAREDNESS CHALLENGE
Choose ONE dry food your family already eats.
Then:
☐ Choose your food
☐ Choose your Mylar bag
☐ Choose the appropriate oxygen absorber
☐ Get your sealing equipment ready FIRST
☐ Fill the bag
☐ Keep the sealing area clean and flat
☐ Partially heat seal
☐ Add the oxygen absorber
☐ Finish the seal
☐ Inspect your seal
☐ Label the food
☐ Add the packaging date
☐ Add the oxygen absorber size
☐ Store it somewhere cool, dry and protected
Then stand back and look at it.
YOU JUST ADDED FOOD TO YOUR LONG-TERM STORAGE! ?
✅ DAY 16 — DONE!
One bag.
That's all we asked you to do today.
But maybe next grocery trip you grab an extra bag of rice.
Next time it's beans.
Then pasta.
Little by little, you're building something incredibly useful:
A PANTRY FULL OF FOOD YOUR FAMILY ACTUALLY EATS.
No panic buying.
No giant shopping trip.
No trying to do everything at once.
Just:
BUY A LITTLE.
PACKAGE A LITTLE.
ROTATE A LITTLE.
USE A LITTLE.
REPLACE A LITTLE.
That's how we build food storage that actually works.
ONE LITTLE THING AT A TIME.
— Mimi
PackFreshUSA | 30 Easy Preparedness Ideas