Using Mason Jars for Long Term Food Storage
Posted by PackFreshUSA on May 18th 2017
Dry canning is a favorite way to store dry food for long term. It’s a simple method but first thing first, you need to plan!
What food will you be storing?
When creating a long-term food storage plan, it is best to imagine using it. If tonight you needed to use your food supply to feed your family, what would be easy to fix? What would they ask for? It wouldn't make much sense to fill mason jars with lentils if your family hates lentils, or save corn meal if you don't know what to do with it. There are plenty of great food storage choices, so pick the ones that are best for you and your family. Remember to include spices and treats too.
Here is a list of food products that are great for use with oxygen absorbers:
|
|
|
|
|
|
|
|
|
|
|
|
|
|
|
|
Do you know what size oxygen absorbers you will need?
Knowing what size of oxygen absorber you will need depends on what size mason jar you will be using, which would most likely depend on what you will be storing. See how planning beforehand is important?
Using mason jars for long term food storage is a
little different than Mylar bags. When using Mylar bags, their flexibility
allows them to form around food and minimize air content. Jars cannot do this
so it especially important to make sure you include enough absorption to
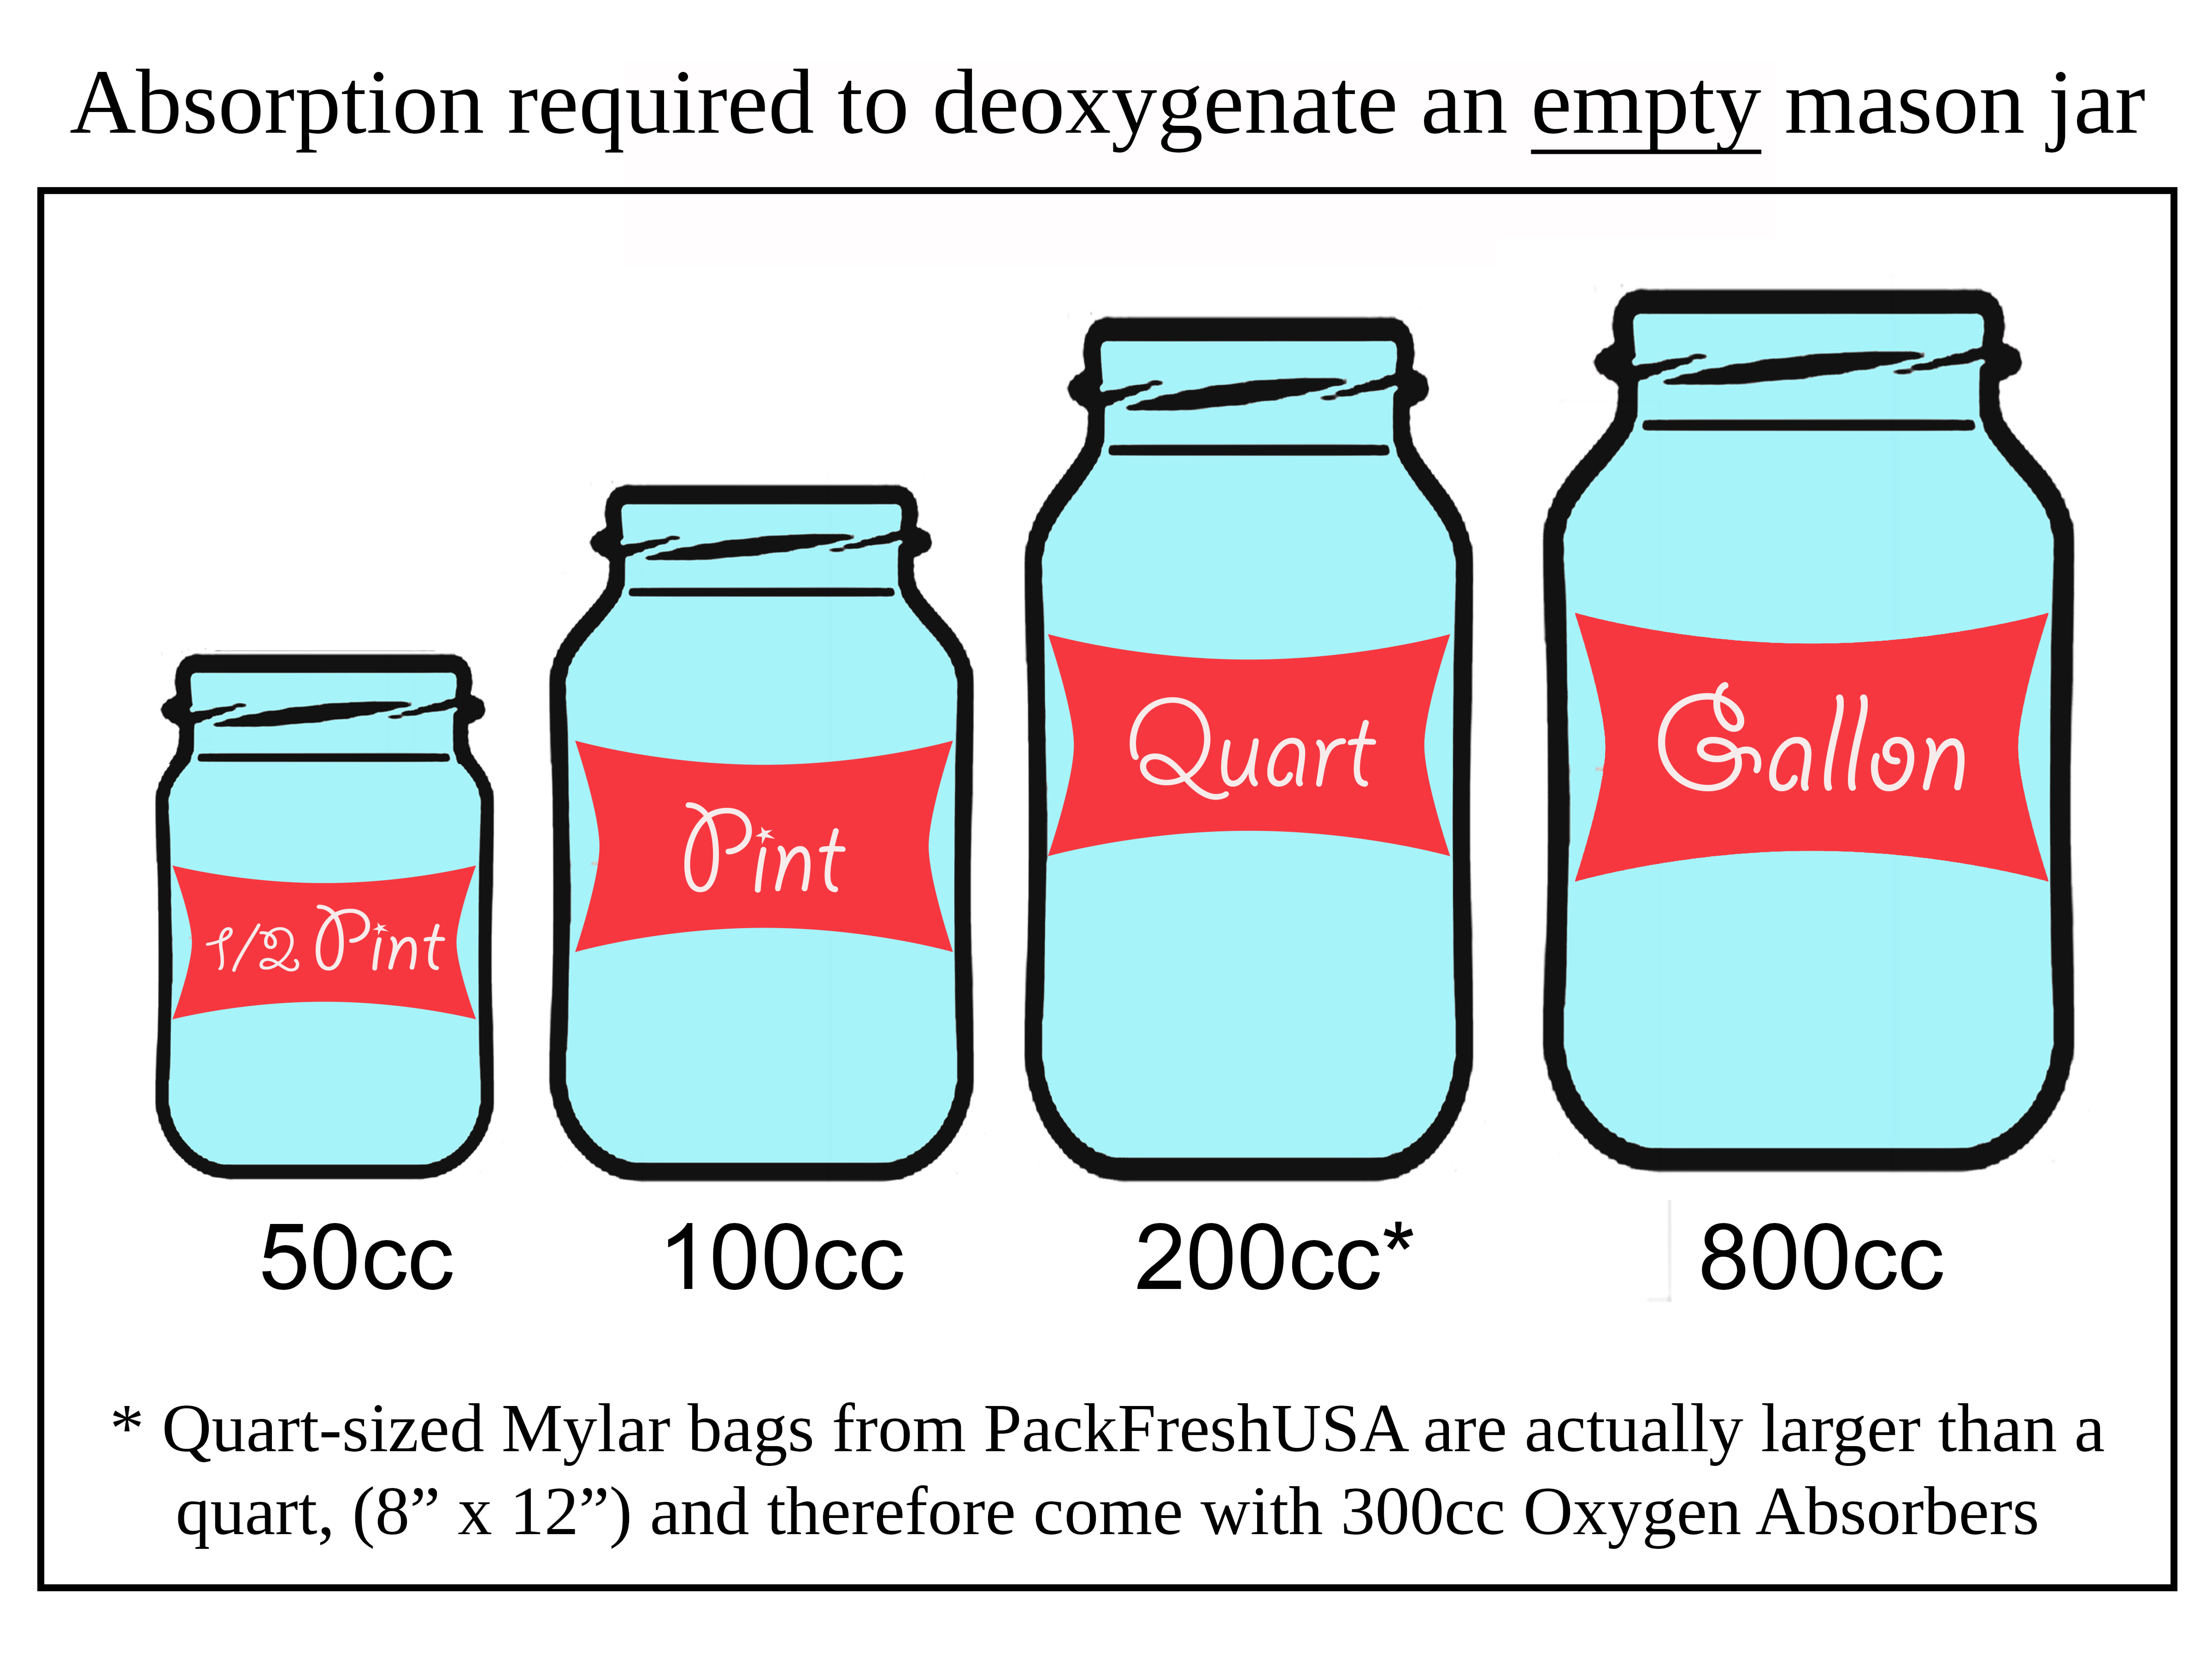
account for all the air. The best way to do this is to use enough absorption to
deoxygenate the jar if it was empty.
Refer back to this image for an easy guide:

Storage
Tip: If you are buying oxygen absorbers in bulk, the chances are you will have
some left over. Storing your extra absorbers in a mason jar is a great idea!
Do you have everything you will need to get started?
Here is a quick checklist to use:
_ Make sure you have a clean working area
_ A sterile mason jar or jars
_ Permanent marker and labels/masking tape
_ Funnel (optional)
_ Small pitcher or scoop (optional)
Getting
started…
You will need to limit the amount of time the oxygen absorbers are exposed to
air so creating an assembly line is the most beneficial.
Begin with filling each jar using a scoop or funnel if
you like, it will make the process easier and the less chance of making a huge
mess. As you fill each jar, use a permanent marker to label each jar with the
product name, date, and any other information that may be useful. Don’t forget
to include prep directions if necessary. Packing the food as tightly as possible
reduces the air volume. To do this, pour some of the product in the jar, press
down on the product to remove any air pockets and maximize density. Continue
doing this until each jar is full and ready for the oxygen absorbers.
Place the oxygen absorbers in each of the jars, right on top, in with the food.
Tightly seal each jar according to the jar manufacturer’s direction. An
advantage to using mason jars with a domed metal lid or “button” is their inflexibility
will ALWAYS allow you to notice the 21% air volume decrease when the oxygen is absorbed
as the vacuum created will suck the lid inward. This acts as confirmation that
the process worked.
And that’s it. You’re all done. Easy peasy…by the way, did you know you can store dehydrated peas as well?
Follow-up and Storage
Most of the oxygen will be done from the jars in 6 to 12 hours. The ideal storage location is cool, dark, and dry. It is also always prudent to store all food 6 inches off the ground. Mason jars and oxygen absorbers can protect your food from oxygen indefinitely, but it is best to rotate your food supply annually by actually using it.
We have made things easier!

